
Sharp garden clippers make pruning faster, cleaner, and much easier on your hands. If you are looking for how to sharpen clippers garden, the real goal is simple: restore a clean edge without overheating the blade or changing its shape.
That matters more than most people think. A dull blade crushes stems instead of slicing them, which can leave ragged cuts, slow plant recovery, and make each snip feel harder than it should. The good news is that most garden clippers can be sharpened well at home with a few basic tools and a careful method.
Below, you will learn how to check the blade, clean it, sharpen it by hand, test the edge, and keep the clippers working longer. You will also see the mistakes that ruin a good edge, plus simple maintenance habits that save time the next time you prune.
Start by checking the blade type and condition
Before you sharpen anything, look closely at the tool. Garden clippers are not all built the same, and the blade style tells you what kind of sharpening works best. Bypass pruners, anvil pruners, and hedge shears each need a slightly different touch.
Bypass clippers have two curved blades that pass each other like scissors. These usually need only the cutting blade sharpened, not the flat counter blade. Anvil clippers cut against a flat surface, so the main blade should be sharpened, but the flat anvil face should stay smooth and clean rather than aggressively ground down.
Check for damage before you sharpen. Small nicks, rust spots, sap buildup, and loose pivot bolts are common. Deep chips, bent blades, or severe pitting may limit how sharp the tool can become again.
What you need before you begin
Most home sharpening jobs do not need fancy gear. A simple setup is enough if you work carefully and keep the angle steady.
- Wire brush or old toothbrush for dirt and sap
- Rubbing alcohol or soapy water for cleaning
- Flat file or sharpening stone
- Diamond file for smaller blades and tight curves
- Fine sandpaper or steel wool for rust cleanup
- Clamp or vise to hold the tool steady
- Gloves and eye protection
- Oil for the pivot and blade surface
If the blades are very dirty, spend 5 to 10 minutes cleaning before sharpening. That small step often makes the biggest difference, because grit can hide the real edge and make your file skip.
Clean the clippers first so the edge is easier to see
A dirty blade is hard to sharpen well. Sap, soil, and rust create a rough surface that hides the true cutting edge and can make you remove too much metal by mistake.
Wipe the blades with warm soapy water or rubbing alcohol. For sticky sap, let the cleaner sit for a minute, then scrub with a toothbrush or nylon brush. If there is light rust, use fine steel wool or a Scotch-Brite pad before sharpening.
Open and close the clippers a few times while cleaning around the pivot. Many people miss this part, but dried sap in the joint can make the tool feel dull even when the blade is reasonably sharp. A stiff pivot also makes accurate sharpening harder because the blades do not meet the same way each time.
Take the clippers apart only if needed
Some clippers sharpen fine while assembled. Others are easier to work on if you remove the blade and handle sections. If you do take them apart, lay the parts in order so reassembly is simple.
Do not force rusty screws. If a screw is stuck, a drop of penetrating oil and a few minutes of waiting may help. For most home jobs, it is fine to sharpen the cutting blade while the tool stays together, as long as you can hold it steady.
Use the right angle and make controlled strokes
This is the core of how to sharpen clippers garden: follow the existing bevel, keep your angle steady, and use light pressure. Most garden clipper blades are sharpened at about 20 to 30 degrees, though the exact angle depends on the original factory edge.
If you sharpen at the wrong angle, the blade may still feel rough or may wear out faster. If you sharpen too steeply, you remove too much metal and shorten the blade’s life. Matching the original bevel is the safest method.
Sharpen bypass clippers
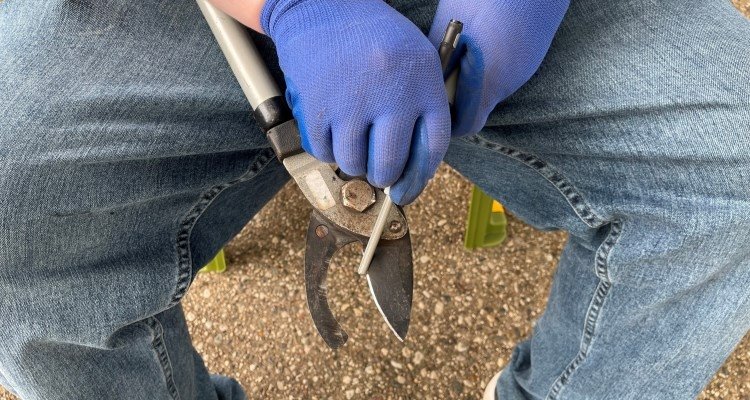
- Clamp the tool or hold it so the cutting blade faces you.
- Find the beveled edge on the cutting blade.
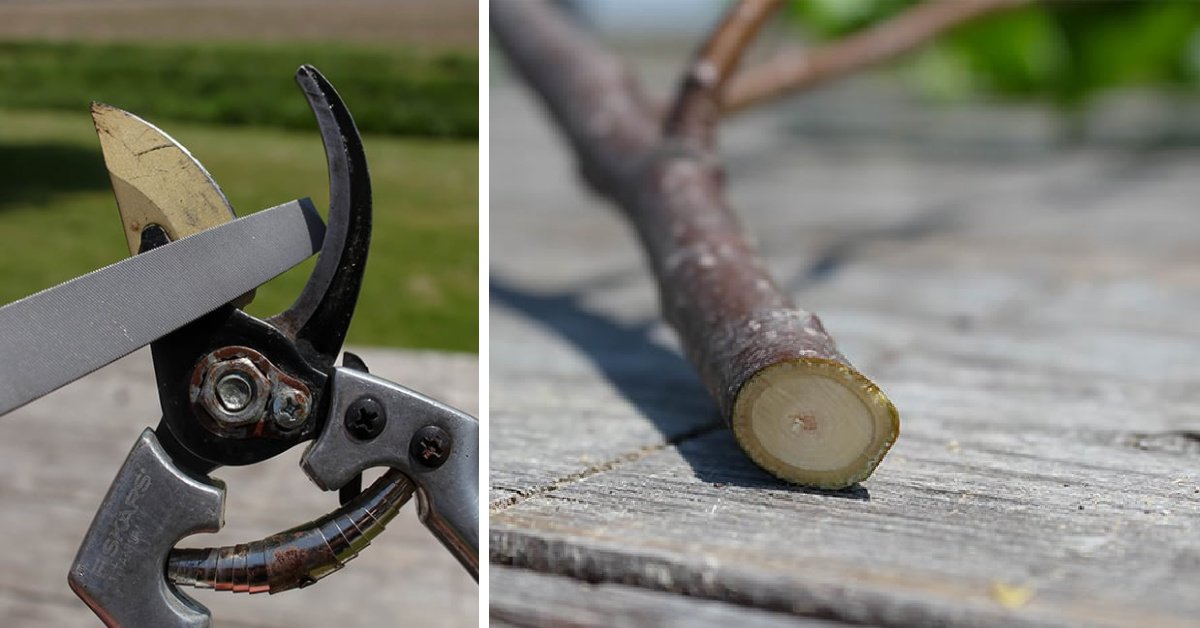
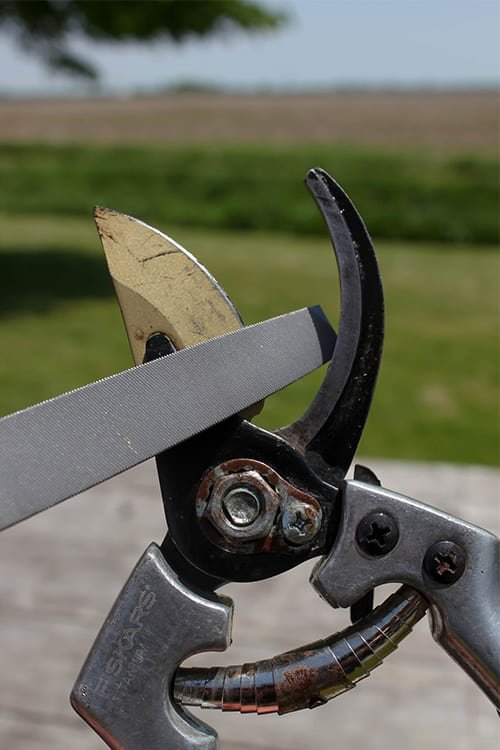
- Run a flat file, sharpening stone, or diamond file along the bevel in one direction only.
- Use smooth strokes from the base of the blade toward the tip.
- Repeat 5 to 10 strokes, then check the edge.
- Remove the burr from the flat side with one or two very light passes.
The burr is the tiny curled metal edge that forms during sharpening. Beginners often ignore it, but if you leave it there, the blade can feel sharp at first and then quickly seem dull again. A light pass on the flat side removes it cleanly.
Sharpen anvil clippers
With anvil clippers, focus on the sloped cutting blade only. Keep the flat anvil surface smooth, clean, and free of gouges. If the anvil has deep grooves, the blade can still cut poorly even after sharpening because it no longer meets a smooth surface.
Use the same one-direction motion along the factory bevel. Do not saw back and forth like you are filing wood. That kind of motion can create an uneven edge and leave scratches that snag plant tissue.
Work slowly around curves and tips
Most clippers are not perfectly straight, so the tip and curve need extra attention. Use shorter strokes on rounded sections and lighter pressure near the point. The tip often does most of the work during pruning, so a neglected tip can make the whole tool feel dull.
For small pruning shears, a diamond file usually gives more control than a large flat file. For hedge shears, a longer file helps you follow the blade length without creating dips.
Know when to stop so you do not ruin the blade
More sharpening is not always better. Garden clippers do not need a razor edge like a shaving tool. They need a clean, smooth edge that slices plant tissue without crushing it.
One helpful sign is the shape of the edge itself. If the bevel is now shiny and even, and the blade can slice thin paper or a leaf cleanly, it is usually ready. If you keep filing long after that point, you thin the blade too much and wear out the tool faster.
Another beginner mistake is trying to “fix” every tiny mark. A few light scratches are normal. Deep chips are different. If the blade has a large nick, you may need to remove more metal than expected to restore the edge, and that can change the blade shape slightly.
If the blade is badly pitted from rust, sharpening may improve performance, but it may never feel brand new. In that case, the practical goal is a clean working edge, not perfection.
| Blade condition | What to do | What to avoid |
|---|---|---|
| Light dullness | Clean, file the bevel lightly, remove burr | Over-filing the edge |
| Sap and grime buildup | Degrease first, then sharpen | Sharpening through the residue |
| Minor rust | Remove rust, then sharpen and oil | Ignoring the rust spots |
| Deep chips or bends | Consider repair or replacement | Grinding away too much steel |
Credit: creeklinehouse.com
Test the edge with a simple cutting check
After sharpening, test the blades before you go back to the garden. The easiest test is a clean cut on a sheet of paper, a piece of thin cardboard, or a soft stem. The cut should feel smooth, not crunchy or torn.
For pruning tools, a better real-world test is a fresh twig or tender stem. A sharp blade should pass through with little squeeze force. If you need to twist your wrist or press hard, the blade probably needs a little more work or the pivot may still be too tight.
Adjust the pivot if the tool still feels dull
A common problem is blaming the blade when the pivot is actually the issue. If the bolt is too loose, the blades wobble and miss each other. If it is too tight, the tool drags and feels sticky.
Open and close the clippers a few times. The movement should be smooth, with just enough tension to keep the blades aligned. A drop of oil at the pivot often helps more than people expect. This is one of those non-obvious fixes many beginners miss.
If the tool still struggles after sharpening, look at blade alignment. The blades should pass cleanly with even contact. Poor alignment can make a sharp blade act dull because it never meets the counter blade correctly.
For official care and safety guidance on garden hand tools, you can also check this consumer safety guidance before handling sharp blades.
Finish with oiling and storage so the edge lasts longer
Sharpening is only half the job. If you leave the metal dry, dirty, or exposed to moisture, the blade will dull and rust faster. A few minutes of care after sharpening can add months of useful life.
Wipe the blade with a clean rag and apply a thin coat of light oil. You do not need much. A thin film helps resist rust and reduces friction the next time you cut. Also oil the pivot point so the handles move without grinding.
Store clippers in a dry place, away from fertilizer bags, wet soil, and sprinklers. Fertilizer dust and damp storage areas speed up corrosion. Hanging the tool or keeping it in a sheath is better than tossing it into a bucket with other metal tools.
Credit: creeklinehouse.com
How often should you sharpen?
That depends on use, but a practical rule works well for most home gardeners. If you prune lightly, sharpen once or twice per season. If you use clippers often, clean and check them every few weeks, then sharpen when cuts start to feel rough.
One useful habit is to wipe the blades after every gardening session. That takes less than a minute, yet it prevents sap from hardening and makes the next sharpening job much easier. Small maintenance is more effective than one big rescue repair later.
Common mistakes that make clippers cut worse
Many sharpening problems come from simple habits, not bad tools. The first mistake is filing in both directions. Files cut on the push stroke, so dragging them back and forth can dull the edge you just formed.
The second mistake is changing the blade angle. If you flatten the bevel too much, the edge becomes weak. If you steepen it too much, the blade loses its slicing action. Follow the original angle as closely as possible.
The third mistake is skipping cleaning. Sap and grit are not just messy; they also hide damage and make sharpening uneven. The fourth mistake is forgetting the flat side of bypass blades. A tiny burr left there can ruin the cut.
Another issue is using the wrong tool for the job. A coarse file can remove metal too fast on small pruners. A fine diamond file gives better control on delicate blades, especially when you only need a light touch-up.
When sharpening is not enough
Sometimes the blade is simply too far gone. If it has cracks, major bends, or heavy rust through the metal, sharpening will not restore it safely. In that case, replacement is the smarter choice.
Also, if the handles are loose, the spring is broken, or the locking mechanism fails, the tool may feel bad even with a decent edge. Clean cutting depends on the whole tool, not just the sharp part.
Keep the cut clean by matching the tool to the plant
Sharp clippers help, but plant choice matters too. Soft green stems cut easily. Woody stems and dead twigs need more force, and that can make even a sharp blade feel less effective. Use the right tool for the material.
Bypass clippers are best for live stems because they slice cleanly. Anvil clippers are better for dead wood or tougher dry material. Hedge shears work well for thin branches and shaped hedges, but they should not be used for thick stems that exceed the tool’s design.
One subtle point: cutting too close to the pivot can increase leverage and make the tool seem dull. Use the blade length as intended, and do not try to force oversized branches through small hand pruners. That will damage the edge faster than normal use.
Clean cuts matter because plants heal better from smooth tissue edges. A sharp edge is not just about comfort. It helps the plant recover with less stress, which is the whole point of good pruning.
Final thoughts on sharpening clippers the right way
If you want how to sharpen clippers garden to feel simple, remember the basic sequence: clean first, sharpen the correct bevel, remove the burr, test the cut, then oil and store the tool. That process gives cleaner cuts and keeps the clippers working longer.
Most people do not need aggressive grinding. They need a steady hand, a clean blade, and a few careful strokes at the right angle. Once you learn the feel of a properly sharpened edge, you will prune faster and with less hand strain.
The best results come from regular maintenance, not emergency repair. A quick wipe after each use and a light sharpening a few times a year usually beat one hard sharpening session after the blades are badly neglected.
Credit: mygardenlife.com
FAQs
How do I know if my garden clippers need sharpening?
If stems start to crush, tear, or require extra hand force, the blades are likely dull. Another sign is a rough or jagged cut on soft stems. Clean clippers should slice with much less pressure.
What angle should I use when sharpening garden clippers?
Most garden clipper blades do best at about 20 to 30 degrees, but the safest method is to follow the original bevel already on the blade. Matching the factory angle helps the tool cut cleanly and wear more evenly.
Can I sharpen clippers with a regular kitchen knife sharpener?
Usually no. Kitchen sharpeners are made for straight knife edges, not the curved and angled blades on garden clippers. A flat file, diamond file, or sharpening stone gives better control and a more accurate edge.
Should I sharpen both blades on bypass pruners?
Normally only the cutting blade needs sharpening. The flat counter blade should stay smooth and clean so it can support the cut. After sharpening, remove any burr from the flat side with one light pass.
How often should I oil garden clippers after sharpening?
Oil them right after sharpening, then reapply as needed when the pivot starts to feel dry or stiff. A light coat on the blade and a drop at the pivot helps prevent rust and keeps the action smooth.