
If your hedge trimmer is tearing leaves instead of slicing them, the problem is usually dull blades. Learning how to sharpen garden shears is a quick skill that makes pruning cleaner, faster, and easier on your hands.
Sharp shears do more than look nice. They help plants heal faster, reduce crushing on stems, and make every cut feel smoother. With the right tools and a few careful passes, you can restore a good edge in less than 30 minutes.
This guide shows you what to use, how to sharpen safely, how to check your work, and how to avoid the small mistakes that ruin the edge. You will also learn when sharpening is enough and when the blades are too damaged to save.
Before you start: check the shears and gather the right tools
Not every pair of garden shears needs the same treatment. Some only need a light touch-up, while others have nicks, rust, or a loose pivot that must be fixed first. A sharp blade will still cut poorly if the tool is dirty, bent, or assembled badly.
Start by opening and closing the shears a few times. If the blades wobble, stick, or leave a gap, sharpening alone will not solve the problem. You should also look for deep chips on the cutting edge, because a file can handle minor wear but not major damage.
For this job, keep the setup simple. You do not need a workshop full of gear, just a few basic items that give you control and safety.
- Wire brush or old rag for removing dirt and sap
- Warm soapy water for a basic clean
- Flat file or diamond sharpening tool for most garden shears
- Fine grit whetstone for a light finishing touch
- Lubricating oil for the pivot and blade surface
- Gloves to protect your hands
- Clamp or vise if you want more stability
One thing beginners often miss: dirt can hide the real edge. A blade that looks dull may actually be coated with sap and grime. Cleaning first saves time and prevents you from grinding unnecessary metal off the blade.
How to sharpen garden shears step by step
The best way to sharpen garden shears is to work on the beveled edge only. The bevel is the slanted side that already has the cutting angle. If you sharpen the flat side, you can ruin the blade geometry and make the tool cut worse.
1. Clean the blades completely
Wash the shears with warm soapy water or wipe them with a damp rag. Remove all sap, soil, and rust flakes. If the blade is sticky, use a little rubbing alcohol or a safe degreaser, then dry it fully.
Cleaning matters because grit acts like sandpaper in the wrong place. It can scratch the blade, clog your file, and make the edge uneven. A clean blade also lets you see the cutting edge clearly, which helps you work more accurately.
2. Secure the shears
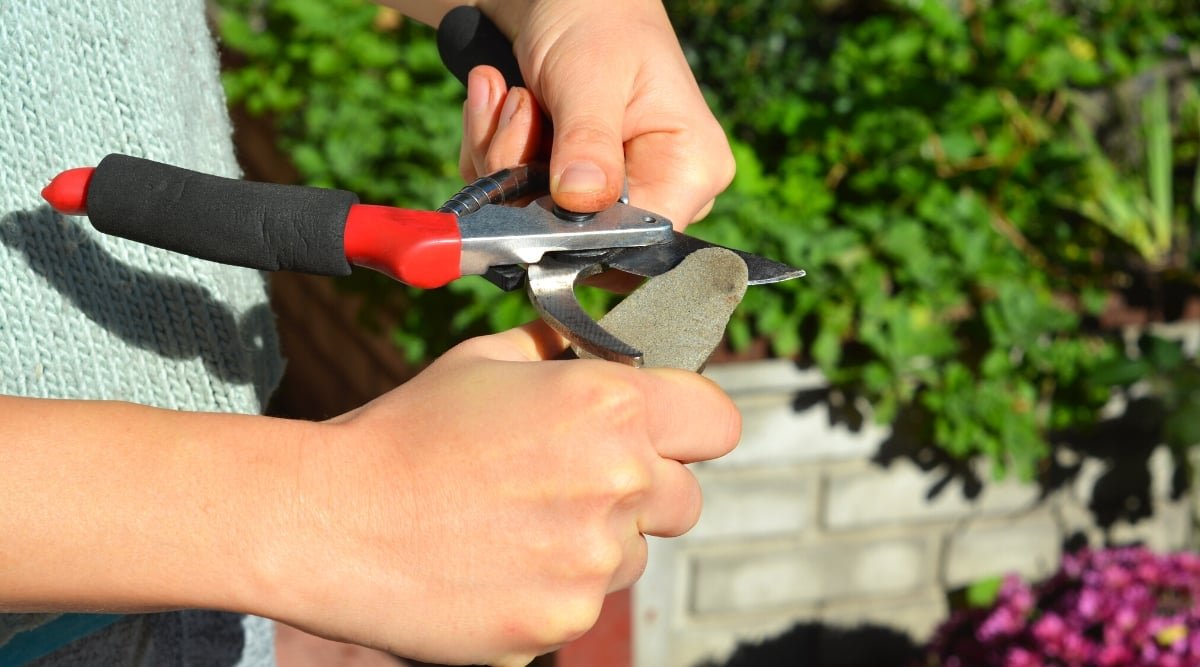
Hold the tool firmly on a stable surface or clamp one handle in a vise. Keep the cutting edge facing up and easy to reach. If you are holding the tool by hand, make sure your grip is steady and your fingers stay away from the edge.
Stability gives you a smoother angle. If the blade moves while you file, you can create flat spots or rounded edges. That kind of damage is one reason many people sharpen for 10 minutes and still get poor cuts.
3. Find the beveled edge
Look closely at the blade. Most bypass shears have one sharpened edge and one flat edge. The beveled side is the one to sharpen. On anvil-style shears, the cutting blade still gets sharpened, but the flat anvil side is usually replaced or cleaned rather than filed heavily.
If you are not sure which side to work on, compare both sides in good light. The sharp side usually has a visible angle. Filing the flat side can change the blade’s fit and reduce cutting performance.
4. File from the base to the tip
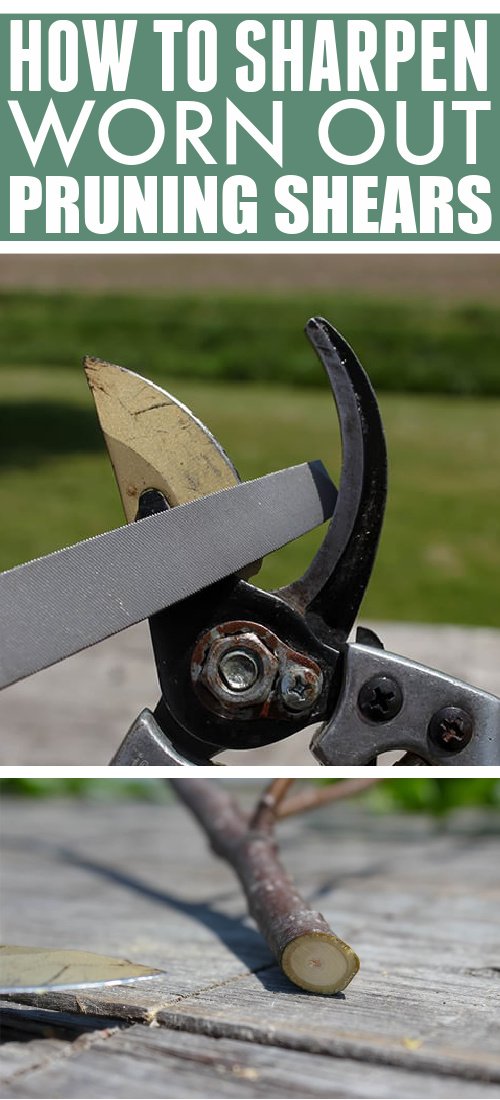
Use a flat file or diamond tool and follow the original angle of the blade. Push the file in one direction, usually from the base toward the tip. Make steady strokes and keep the angle consistent. Most shears need only 5 to 10 strokes per section, not aggressive grinding.
Do not saw back and forth like you are cutting wood. That can leave jagged marks and heat the metal more than necessary. Smooth, single-direction strokes produce a cleaner edge and a longer-lasting finish.
5. Remove burrs from the back side
After filing the beveled edge, turn the blade over and feel for a tiny rough ridge on the flat side. That ridge is called a burr. It is normal after sharpening, but it should be removed so the blade can close cleanly.
Use one or two very light passes on the flat side with a fine stone or file. You are not trying to sharpen this side. You are only knocking off the burr. This small step improves cutting quality more than many people expect.
6. Test the edge
Try cutting a thin piece of paper, soft plant stem, or a small twig. A properly sharpened shear should cut smoothly without crushing. If the blade still drags or tears, check for more burrs, a dull spot near the tip, or a loose pivot.
Test the tool in several spots along the blade. The heel near the base often gets attention, but the tip is easy to neglect. A shear with a sharp base and a dull tip still feels weak when you use it in the garden.
7. Clean, oil, and reassemble
Wipe away metal dust, then apply a thin layer of oil to the blade and pivot. If the shears have a bolt or spring, check that everything is seated properly and not overtightened. Open and close the tool a few times to make sure it moves smoothly.
Oil does two jobs. It reduces friction, and it slows rust. A well-oiled pivot can make the shears feel dramatically better, even when the blade edge is only moderately sharpened.
How to know when the edge is right
A good sharpening job should produce a clean, easy cut with very little pressure. The blade should not crush stems, and it should not grab or skip across the plant material. If the shears feel smooth in your hand and the cut looks neat, the edge is close to right.
Many people assume sharper always means thinner. That is not true. Garden shears need a controlled edge, not a razor edge. If you make the blade too thin, it can chip faster, especially when cutting woody stems or dead branches.
There are a few signs that tell you the blade is ready:
- The blade slices through paper or soft stems in one motion
- You can feel less resistance during cutting
- The cut surface looks clean instead of mashed
- The shears close fully without catching
One non-obvious point: if your shears are clean and sharp but still cut poorly, the pivot tension may be the issue. Too tight, and the tool feels stiff. Too loose, and the blades do not meet correctly. A tiny adjustment can make a big difference.
Credit: epicgardening.com
Common mistakes that damage garden shears
Sharpening is simple, but a few mistakes can shorten the life of the tool. The most common one is using the wrong side of the blade. Another is filing too hard, which removes more metal than needed and weakens the edge.
A second mistake is ignoring rust. Light rust can often be removed during cleaning, but heavy rust may leave pits in the metal. Those pits make it harder to create a smooth cutting line, and they can cause the blade to snag on stems.
Here are the errors that cause the most trouble:
- Sharpening both sides of a single-bevel blade
- Using heavy pressure instead of steady strokes
- Skipping cleaning before filing
- Leaving burrs on the back side
- Overtightening the pivot after reassembly
Another subtle mistake is chasing a mirror finish when the blade is already functional. That wastes time. For garden work, a practical edge matters more than a polished one.
Special cases: bypass shears, anvil shears, and rusty blades
Different designs need slightly different care. Bypass shears have two blades that slide past each other like scissors. They usually give the cleanest cuts on living plants, and they are the easiest to sharpen correctly.
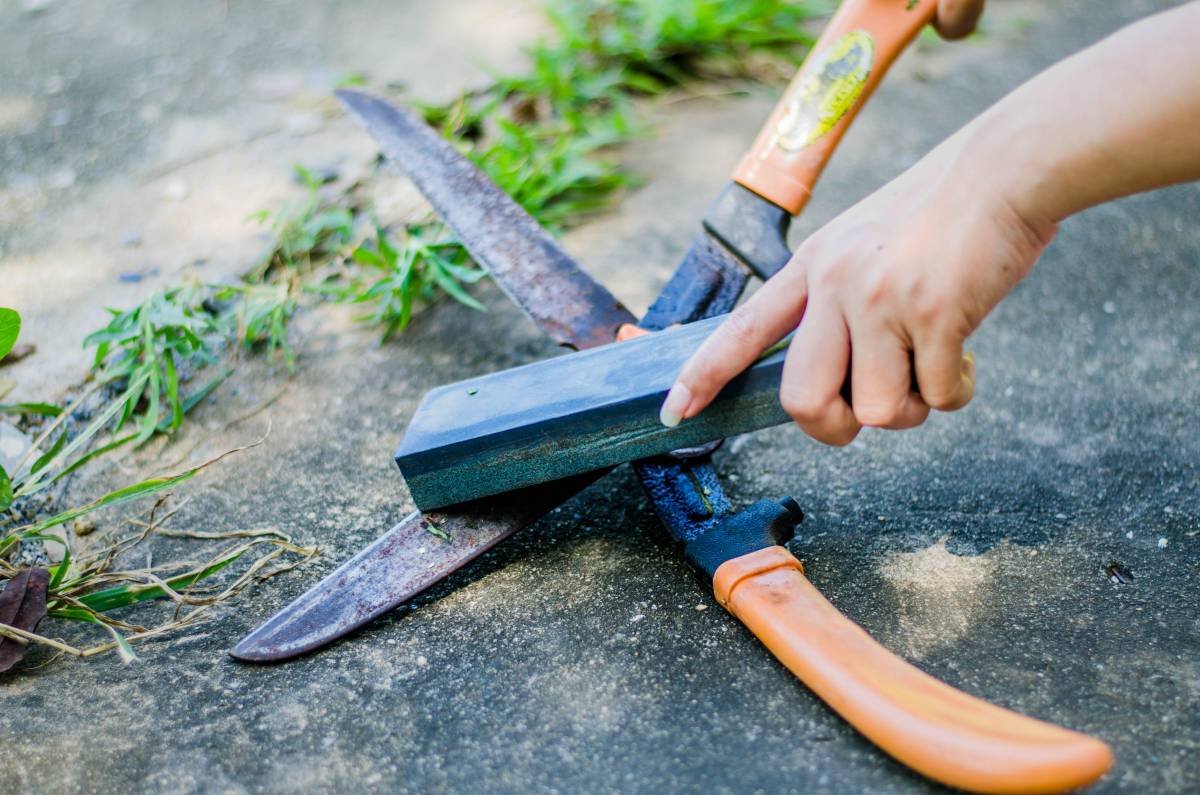
Anvil shears have one cutting blade that closes onto a flat surface. They are often used for tougher or dead wood, but they can crush soft stems if the edge is not sharp. With this design, focus on the cutting blade and keep the anvil clean and flat.
Rusty blades need extra patience. If the rust is light, a wire brush, fine steel wool, or a rust remover can clear it. If the rust has eaten deep into the metal, the blade may never cut perfectly again. In that case, sharpening can improve performance, but it will not fully restore the original edge.
For safety and maintenance guidance, the official home safety guidance from CPSC is a useful reference when working with sharp hand tools around the house and garden.
Credit: airtasker.com
When sharpening is not enough
Sometimes the tool needs repair or replacement instead of sharpening. If the blade is bent, deeply nicked, or loose at the rivet, the cut will remain poor. You may also need to replace the spring if the handles no longer open smoothly.
A practical rule helps here: if you can feel a few tiny nicks, sharpen. If you can see major chips, cracks, or warping, stop and inspect the tool more carefully. Forcing a damaged blade to work usually makes the problem worse.
Keep the edge longer with simple maintenance
Sharpening once is not the goal. The goal is to keep the shears working well with less effort over time. A few small habits can stretch the life of the blade and reduce how often you need to file it.
First, wipe the blades after each use. Sap and plant moisture can harden quickly, especially after pruning shrubs or cutting resin-heavy stems. Second, store the shears dry. A damp shed or open soil contact speeds up rust.
Third, do a quick touch-up before the edge gets very dull. Light maintenance takes only a few minutes, while a neglected blade may need a much longer repair session. That is one of the biggest time-savers beginners overlook.
- Clean after every pruning session
- Oil the pivot once in a while
- Check the bolt tension monthly during heavy use
- Store in a dry place, not on wet concrete
- Use the right tool for the right stem size
Cutting material matters too. Garden shears are for stems, not wire, nails, or thick branches beyond their limit. Using them on hard objects creates tiny edge damage that adds up fast.
A simple process that works for most home gardeners
If you want the shortest path, keep the process in this order: clean, inspect, sharpen the beveled edge, remove burrs, test, and oil. That sequence works for most pruning shears and keeps the blade geometry intact.
For many home gardeners, the whole job takes 15 to 25 minutes the first time. After you get used to the angle and pressure, it often takes less than 10 minutes for routine upkeep. A sharp pair of shears saves more time in the garden than most people expect.
The biggest benefit is not just speed. Clean cuts help plants recover faster and make pruning feel easier on your hands. Once you know how to sharpen garden shears correctly, it becomes a small maintenance task instead of a frustrating chore.
Credit: creeklinehouse.com
FAQs
1. How often should I sharpen garden shears?
For regular home use, check the edge every few weeks during the growing season. If you use the shears often, a light touch-up every 1 to 2 months is usually enough. Heavy use, sap-heavy plants, or gritty dirt can mean more frequent sharpening.
2. Can I sharpen garden shears with a kitchen knife sharpener?
Usually, no. Many kitchen sharpeners are made for straight knife edges and can change the angle of garden shears in the wrong way. A flat file or diamond sharpening tool is safer and gives more control for pruning blades.
3. What angle should I use when sharpening?
Most garden shears work best when you follow the original bevel rather than forcing a new angle. If the tool already has a visible slanted edge, match that angle closely. The goal is consistency, not a specific universal number.
4. Why do my shears still cut badly after sharpening?
The most common reasons are a dirty pivot, a loose or tight bolt, or a burr left on the blade. In some cases, the blade is bent or too damaged to perform well. Check the full tool, not just the cutting edge.
5. Is it safe to sharpen garden shears at home?
Yes, if you work slowly and keep the blade secured. Wear gloves, keep your fingers away from the edge, and file away from your body. If the blade is badly damaged or you feel unsure, get help from a professional tool shop.