If your mower will not start, a dead battery is often the reason. Learning how to install a lawn mower battery is simple, but the order matters if you want a safe, clean connection.
Most battery swaps take less than 20 minutes with basic hand tools. The key is to disconnect power the right way, match the battery type and size, and avoid mixing up the terminals.
This guide walks through the full process step by step, from checking the old battery to testing the new one. You will also see common mistakes, safety tips, and a few details many first-time owners miss.
What to check before you install the battery
Before you touch any cable, confirm that the new battery is the correct fit for your mower. A lawn mower battery is not just “a battery.” It must match the voltage, terminal layout, size, and mounting style your machine expects.
Most riding mowers use a 12-volt battery. Some smaller models use a different setup, so check the owner’s manual or the label on the old battery. If you are replacing a sealed battery, make sure the new one has the same physical dimensions and terminal type.
Also look at the date code on the new battery if it is available. A battery that sat on a shelf for 18 months can already be weaker than a fresh one. That is one of the non-obvious problems many people miss when they buy a replacement.
Tools and materials you may need
- Socket wrench or adjustable wrench
- Screwdriver, if your battery cover uses screws
- Work gloves
- Safety glasses
- Wire brush or battery terminal cleaner
- Clean rag or paper towels
- Corrosion protectant, if needed
If your mower uses a lead-acid battery, handle it carefully. Acid can be harmful, and sparks near battery terminals are a real risk. For general battery safety, the official safety guidance from the U.S. Consumer Product Safety Commission is a good reference point.
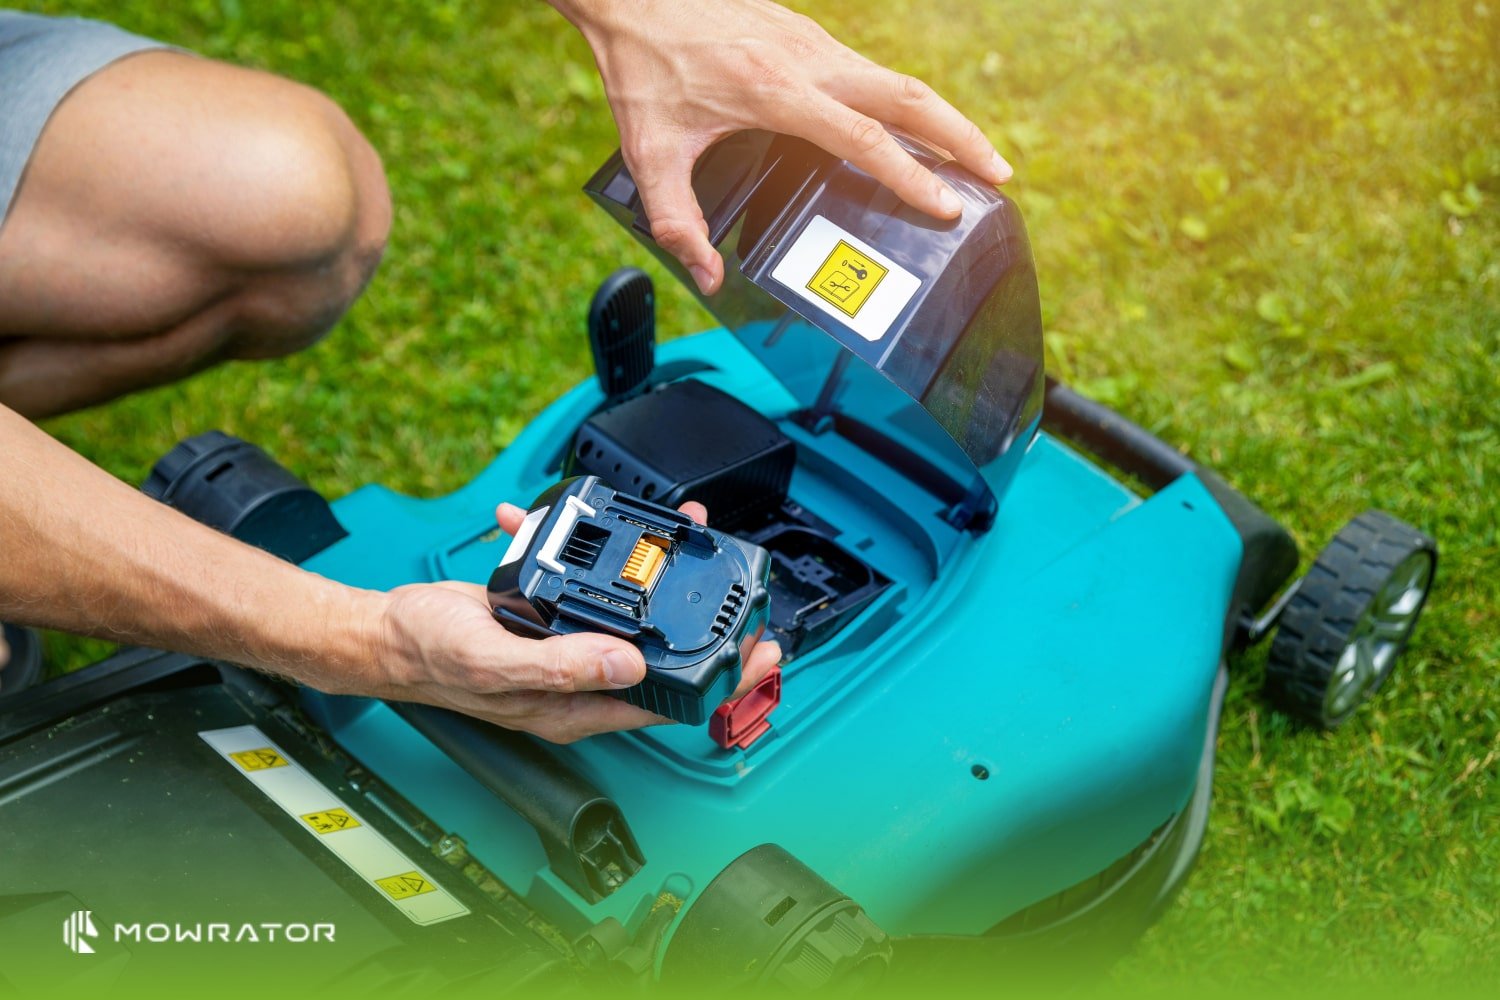
How to remove the old battery safely
Start with the mower turned off and the key removed. If it is a riding mower, set the parking brake and make sure the blades are disengaged. A mower battery can still send power even when the engine is off, so do not skip this part.
The safest rule is simple: disconnect the negative terminal first. The negative cable is usually black and marked with a minus symbol. Removing it first lowers the chance of a short circuit if your wrench touches metal while working on the positive side.
- Open the battery cover or seat area.
- Take a clear look at how the cables are routed.
- Remove the negative cable first.
- Remove the positive cable next.
- Loosen any hold-down strap, bracket, or clamp.
- Lift the battery straight out with both hands.
Do not pull on the wires themselves. Pull on the connector end instead. Tugging on the cable can damage the terminal connection and create a future starting problem that looks like a bad battery.
Set the old battery on a level surface away from metal tools. If the case is swollen, cracked, or leaking, keep your gloves on and avoid touching the fluid. That is a sign the battery is done and should be handled carefully.
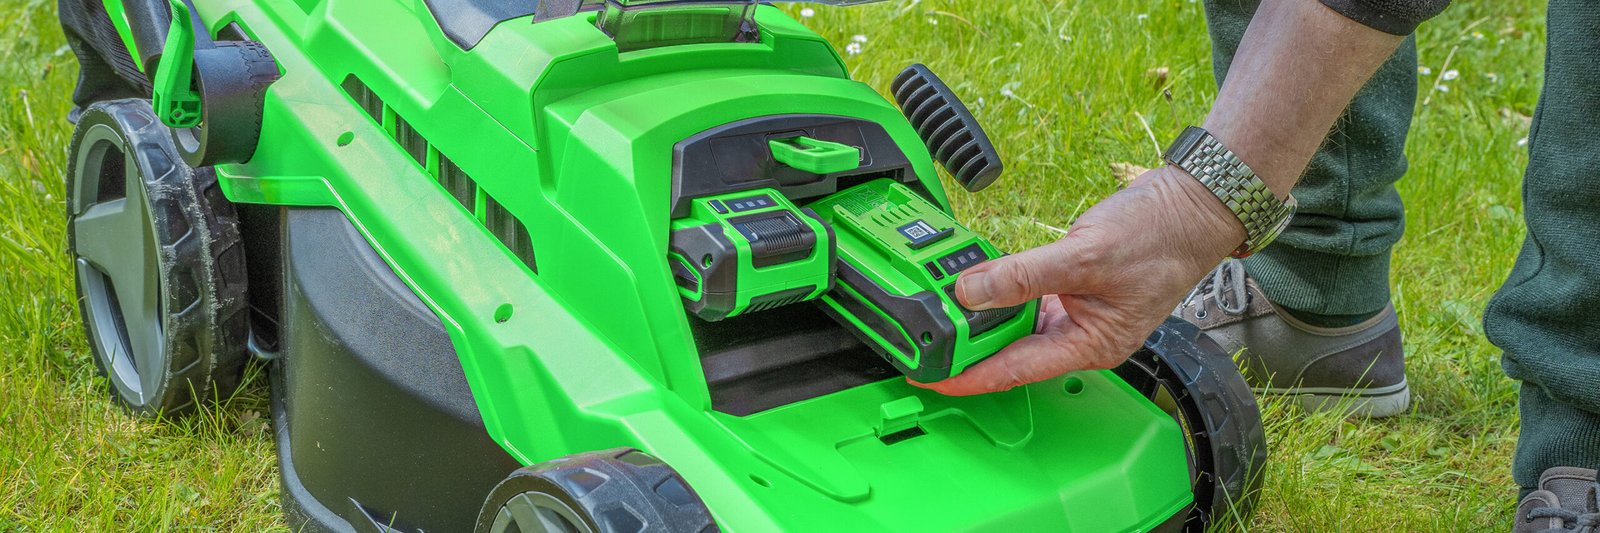
Position the new battery the right way
Before installing, compare the new battery to the old one side by side. Check length, width, height, and terminal position. Even a battery that “almost fits” can cause cable strain or a bad cover fit.
Place the battery in the tray with the terminals facing the same direction as the old one. On many mowers, the positive terminal is on the left or right depending on the model. Reversing the battery is one of the easiest mistakes to make, especially if the tray has room on both sides.
Make sure the battery sits flat. A tilted battery can vibrate during mowing, which shortens battery life and may loosen the terminals. If the tray is dirty, wipe it out before the new battery goes in.
Check polarity before you connect anything
Polarity means which terminal is positive and which is negative. The positive terminal is usually marked with a plus sign (+) and often uses a red cable. The negative terminal is marked with a minus sign (-) and usually uses a black cable.
Never guess here. A reverse connection can blow a fuse, damage the charging system, or harm the mower’s electrical parts. If the cables are faded or the markings are hard to read, clean them first and trace the wire path before connecting.
Connect the lawn mower battery cables
This is the main part of how to install a lawn mower battery. The correct order matters, and it is the opposite of removal. Connect the positive cable first, then the negative cable.
Why this order? If you connect the negative cable first and your wrench touches metal while tightening the positive side, you can create a spark. That is especially important on lead-acid batteries, which may release gas.
- Attach the positive cable to the positive terminal.
- Tighten the connection until it is snug, but do not over-tighten.
- Attach the negative cable to the negative terminal.
- Check that both ends are secure and not twisted.
- Confirm the cables are not pinched under the seat or cover.
A connection should feel firm, not loose. If you can wiggle the terminal by hand, it is not tight enough. Loose terminals are a common reason a new battery seems “bad” even though the problem is only the connection.
After tightening, look for corrosion, dirt, or a white powdery buildup. If you see it, clean it before closing the battery compartment. A dirty terminal can reduce current flow and cause slow cranking.
Credit: mowrator.com
Use the correct tightening force
Do not crank down as hard as possible. Over-tightening can strip the terminal or crack a battery post. Hand-tight plus a small extra turn is usually enough for small mower battery terminals, unless your mower manual says otherwise.
If the connector keeps spinning, stop and inspect it. The clamp may be stretched or worn. That is better to fix now than after the mower refuses to start in the middle of mowing season.
Secure the battery and close the compartment
Once the cables are on, secure the battery in its tray with the strap, bracket, or hold-down hardware. A battery that moves around will wear faster from vibration. It can also loosen the terminals over time.
This step matters more than many people think. Mower vibration is constant, and even a little movement adds up. A battery that shifts a few millimeters every ride can create connection problems after only a few uses.
Before closing the cover or seat, check three things: the cables are routed safely, nothing is rubbing on a sharp edge, and the battery cover closes without pressure. If the cover has to force the battery down, the battery is likely the wrong size.
| What to check | Good sign | Problem sign |
|---|---|---|
| Terminal order | Positive first, negative second | Reversed or uncertain |
| Battery fit | Sits flat with no movement | Shifts, tilts, or jams the cover |
| Connections | Snug and clean | Loose, dirty, or corroded |
| Cable routing | Clear of moving parts | Pinched or rubbing |
Test the mower after installation
After the battery is installed, test it right away. Put the key in, turn the ignition, and listen for the start sound. A healthy battery should give the starter enough power to crank normally.
If the engine turns slowly, do not assume the battery is bad immediately. A loose cable, corroded terminal, or weak charger can create the same symptom. Start with the simple checks first.
For electric-start riding mowers, also test any lights, gauges, or safety switches if your model has them. A battery can be installed correctly and still fail to power accessories if the connection is weak.
What normal startup looks like
A normal start usually means the starter engages quickly, the engine turns over at a steady speed, and there is no clicking sound from a loose connection. If you hear one click but no crank, the battery may be undercharged or one terminal may not be tight.
If the mower starts but dies soon after, the battery may not be the real issue. In that case, the charging system, safety switch, or fuel system may need attention. That is where many beginners get stuck, because the first symptom looks like a battery problem.
Common mistakes when installing a mower battery
Most installation problems come from a short list of mistakes. The good news is that they are easy to avoid once you know what to watch for. A careful 10-minute install is better than a rushed 2-minute one.
- Connecting the cables in the wrong order — always remove negative first and connect negative last.
- Reversing polarity — red goes to positive, black goes to negative.
- Using the wrong battery size — an almost-fit battery can rattle or pinch cables.
- Leaving terminals dirty — corrosion blocks current flow.
- Over-tightening terminals — this can crack posts or damage connectors.
- Skipping the hold-down — vibration shortens battery life fast.
One issue many people miss is the battery tray itself. If the tray is rusted or full of debris, the battery may not sit level. That small tilt can slowly work the terminals loose and create hard-start problems later.
Another hidden issue is storage. If your mower sits for months, install a fully charged battery and keep it on a proper maintainer if the manual recommends one. A battery that slowly drains in storage can seem faulty even when it is not.

Credit: ufinebattery.com
When the battery still will not work
If the mower still will not start after installation, work through the problem step by step. Do not replace the battery again right away. Start with the most likely causes, because many “bad battery” complaints are really connection or charging issues.
- Check both terminals for tightness.
- Look for corrosion or dirt on the posts.
- Confirm the battery is fully charged.
- Verify the fuse, if your mower uses one.
- Make sure the seat switch, brake switch, or blade switch is engaged correctly.
If you have a voltmeter, a fully charged 12-volt battery should usually read around 12.6 volts when resting. A reading much lower than that can mean the battery needs charging before it can crank the engine well.
If the battery tests fine but the mower still only clicks, the starter relay, ignition switch, or starter motor may be the real problem. At that point, deeper diagnosis may save time. If you are not comfortable tracing electrical parts, a service technician can check it faster.
When to call a professional
Call a professional if the battery compartment is damaged, the wiring is burnt, the battery leaks, or the mower shows signs of electrical failure beyond a simple no-start. Also get help if the battery terminals spark repeatedly when you connect them, because that can point to a short circuit.
Safety should come first. If the battery is swollen, hot, or smells like sulfur, stop using it and handle it carefully. Those are warning signs that should not be ignored.
How to make the new battery last longer
A good installation is only the first part. Battery life also depends on how you use and store the mower. Small habits can add months, sometimes years, to battery life.
Keep the terminals clean and dry. Check them a few times during the season, especially if the mower rides over rough ground. A thin film of corrosion can grow slowly and quietly.
Store the mower in a cool, dry place when possible. Heat is hard on batteries, and so is long-term discharge. If your mower will sit for more than a few weeks, follow the owner’s manual on charging or maintenance charging.
Also avoid repeated short starts when possible. Quick turn-on attempts that do not let the engine fully start can drain the battery faster than normal use. That drain is one of those small details many new owners do not think about.
If you want to confirm the exact battery type, terminal layout, and maintenance steps for your model, the official owner’s manual and support page is a reliable place to check manufacturer guidance.
Final take
Installing a mower battery is straightforward when you follow the right order and pay attention to fit, polarity, and connection quality. If you remember only one thing from this guide, remember this: remove negative first, connect positive first, and always secure the battery so it cannot move.
That simple routine solves most of the common problems people face when learning how to install a lawn mower battery. With a correct fit, clean terminals, and a solid hold-down, your mower is much more likely to start when you need it.
Credit: interstatebatteries.com
FAQs
1. How do I know if my lawn mower battery is installed correctly?
The battery is installed correctly if the positive cable goes to the positive terminal, the negative cable goes to the negative terminal, the battery sits flat in the tray, and the hold-down keeps it from moving. The mower should start normally or at least crank strongly.
2. Can I install a lawn mower battery myself?
Yes, most people can do it with basic tools. The job is usually simple if you follow the safety order, match the battery size, and avoid mixing up the terminals. If the wiring is damaged or the battery compartment is hard to reach, get help.
3. Do I connect the positive or negative terminal first?
Connect the positive terminal first when installing a battery. When removing an old battery, take off the negative terminal first. This order helps reduce the chance of sparks and short circuits.
4. Why does my mower still not start after a new battery is installed?
The most common reason is a loose cable or dirty terminal. Other possible causes include a blown fuse, a weak charge, a bad safety switch, or a problem with the starter system. Check the simple items first before replacing more parts.
5. How long should a lawn mower battery last?
Many lawn mower batteries last about 3 to 5 years with normal use, but heat, storage, and charging habits can shorten that time. Keeping the battery charged and the terminals clean usually helps it last longer.