A dull blade tears grass instead of cutting it cleanly. If you want a healthier lawn, learning how to sharpen lawn mower blades is one of the simplest upgrades you can make.
Sharp blades reduce frayed tips, brown edges, and extra stress on the grass. They also make mowing easier on the machine, because the engine does not have to fight through ragged, uneven cuts.
The good news is that the job is manageable with basic tools and a careful process. The key is not just making the edge look sharp, but keeping the blade balanced, removing the right amount of metal, and reinstalling it safely.
What you need before removing the blade
Before you start, gather everything in one place. A smooth workflow matters because a mower blade job is much safer when you are not searching for tools mid-task.
You do not need a workshop full of gear. Most homeowners can do this with a socket wrench, a blade file or grinder, a clamp, gloves, and a way to check balance. A few people also use a torque wrench when reinstalling the blade, which helps tighten it to the manufacturer’s spec without guessing.
For safety, disconnect the spark plug wire on gas mowers and remove the battery on electric models. That step sounds basic, but it prevents accidental starts, which are the most dangerous part of the job. If you want general mower safety guidance from a trusted source, the official mower safety guidance from the U.S. Consumer Product Safety Commission is a helpful reference.
Tools and supplies
- Work gloves
- Safety glasses
- Socket wrench or impact wrench
- Block of wood or blade holder
- Metal file, bench grinder, or angle grinder
- Vise or clamp
- Blade balancer or a nail in the wall
- Wire brush or rag
- Torque wrench, if available
How to know the blade needs sharpening
A mower blade does not need to be polished to a razor edge. In fact, a grass-cutting blade works best with a clean, slightly beveled edge. If the lawn looks whitish at the tips after mowing, the blade may be dull or nicked.
Other clues include ragged grass blades, more clumping than usual, or the mower needing extra passes to finish the job. A blade with visible dents, bends, or missing chunks should often be replaced instead of sharpened.
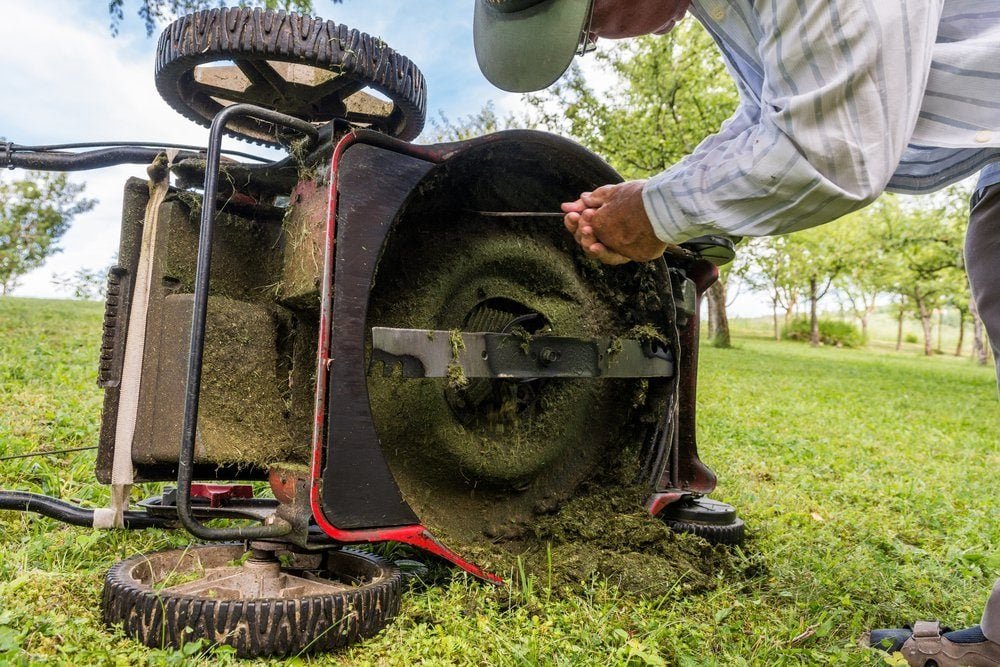
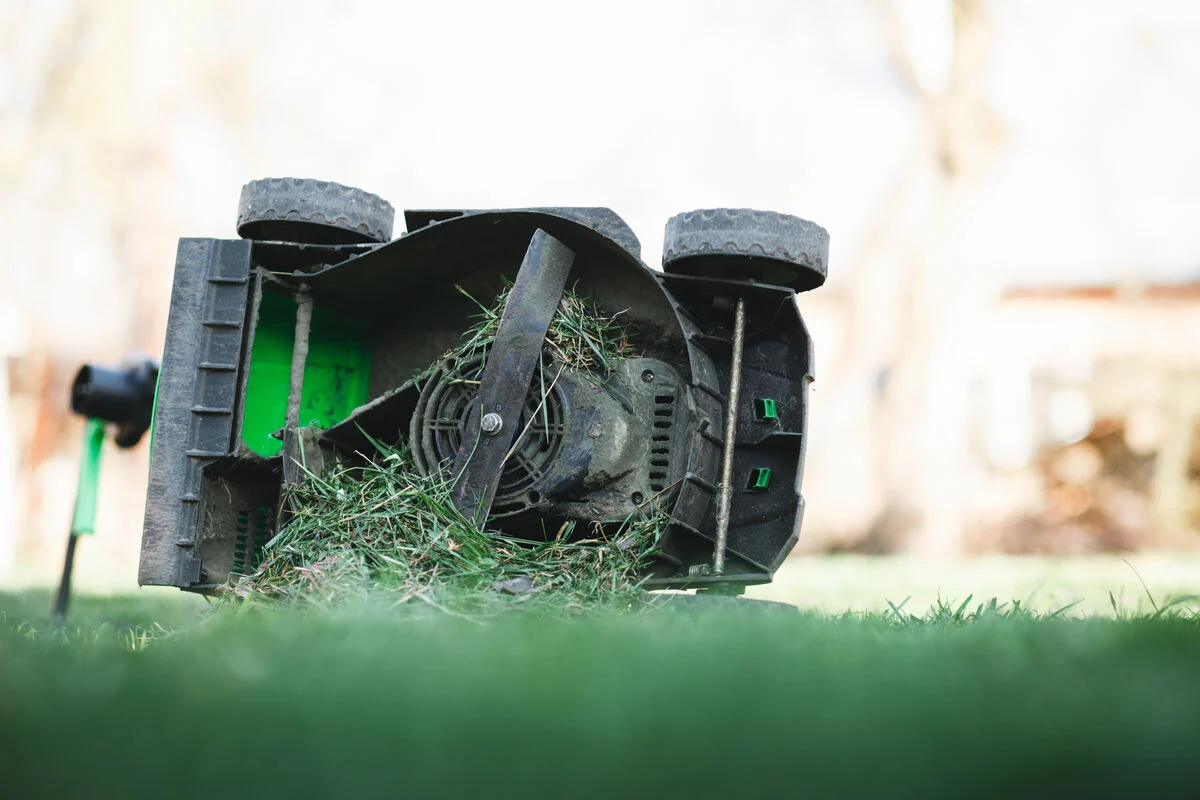
How to remove the blade safely
Removing the blade is usually the messiest part, and it is also where many mistakes happen. The most common problem is trying to work too fast, which leads to stripped bolts, hand injuries, or a blade that goes back on the wrong way.
Tip the mower only as the manual allows. On many gas mowers, the air filter and carburetor side should stay up to avoid oil or fuel leaks. If the manual is available, follow it. If not, check the mower model’s official manual page from the manufacturer before you tilt it.
- Disconnect the spark plug wire or battery.
- Tip the mower safely and support it so it cannot move.
- Mark the blade’s underside with chalk or tape so you remember which side faces down.
- Block the blade with wood to keep it from spinning.
- Use the correct socket to loosen the bolt, turning counterclockwise on most models.
- Remove the blade and keep track of washers, spacers, and the bolt order.
One non-obvious detail: some mower blades are not symmetrical. The lift wings, curved ends, or stamped markings matter. Reinstalling the blade upside down can reduce cutting performance and may even overload the engine.
How to sharpen lawn mower blades the right way
This is the core skill. The goal is a clean cutting edge, not an ultra-thin knife edge. A mower blade should slice grass efficiently, but it also needs enough strength to handle rocks, sticks, and normal yard debris.
There are three common methods: hand filing, bench grinding, and angle grinding. Filing removes metal slowly and gives the most control. Grinding is faster, but it also removes metal faster, which can overheat the edge or change the blade shape if you are not careful.
1. Clean the blade first
Use a wire brush or rag to remove dirt, packed grass, and rust. A clean blade is easier to inspect, and you will see nicks or cracks more clearly. If the blade is caked with debris, you may think it is dull when it is actually damaged.
2. Identify the cutting edge
Most mower blades have two cutting edges, one on each end. They usually have a slight angle, and the top side may be curved or raised. Only sharpen the beveled cutting edge, not the flat side.
A good rule is to match the existing angle. Many mower blades are sharpened near a 30 to 40 degree bevel, though the exact angle can vary by brand and blade design. Do not try to create a brand-new shape unless the blade is heavily worn and you know what you are doing.
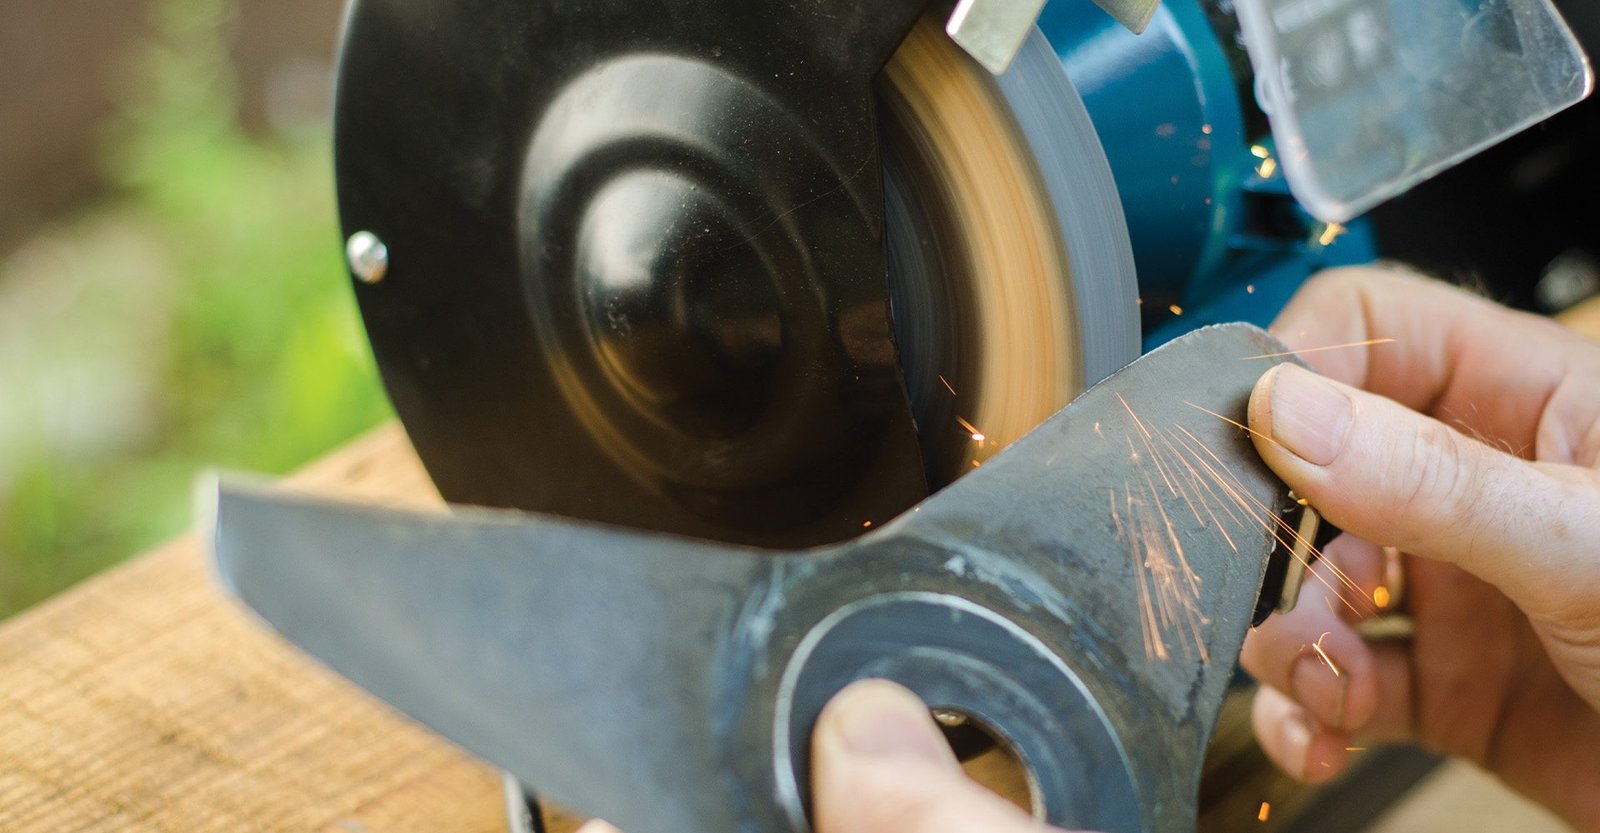
3. Choose your sharpening method
With a metal file: Clamp the blade securely and stroke the file in one direction along the bevel. Use steady pressure and keep the angle consistent. This takes longer, but it gives excellent control and is ideal if the blade only has light dulling.
With a bench grinder: Use short passes and cool the blade often. If the metal turns blue, you are overheating it. That weakens the edge, so pause and let it cool before continuing.
With an angle grinder: This works well for moderate wear, but it is easy to remove too much metal. Use a light touch and check the edge often. Beginners often push too hard and shorten the blade more than needed.
4. Sharpen both ends evenly
Each side of the blade should lose about the same amount of metal. If one end gets more material removed than the other, the blade may become unbalanced. That creates vibration, which can wear out spindle bearings and make the mower feel rough.
Keep the sharpening motion consistent. Try to preserve the original edge angle, and stop once the cutting edge is clean and free of major nicks. You are not trying to shave with the blade; you are trying to restore an efficient cutting surface.
5. Do not over-sharpen
A very sharp, razor-thin edge is not ideal for a lawn mower. It dulls quickly and may chip faster when it hits debris. A slightly stronger edge lasts longer and performs better in real yard conditions.
One useful test is to run a finger lightly near, not on, the edge. If the edge looks uniform and does not feel jagged, you are usually close. If the blade has deep gouges or a crack, replacement is smarter than more grinding.
Check balance before reinstalling
Balance matters more than many people realize. A blade can be sharp and still perform badly if one side weighs more than the other. Unbalanced blades cause vibration, noisy operation, and extra strain on the mower deck and engine.
You can use a blade balancer, which is the easiest option. If you do not have one, hang the blade on a nail or screwdriver shaft through the center hole. If one side drops lower, that side is heavier and needs a little more metal removed.
| What you see | What it usually means | What to do |
|---|---|---|
| Blade stays level | Balance is good | Reinstall the blade |
| One end drops down | Heavier side | Remove a small amount of metal from that end |
| Blade wobbles or feels uneven | Possible bend or damage | Inspect for warping or replacement need |
Balance checks are one of the easiest ways to avoid a mistake that beginners miss. Many people sharpen the edge carefully, then skip balancing and wonder why the mower vibrates badly afterward. Ten extra minutes here can save the spindle and your hands from unnecessary shaking.
Credit: familyhandyman.com
Reinstall the blade correctly
Reinstalling the blade is not just the reverse of removal. Orientation matters, bolt tightness matters, and any missing spacer can change how the mower cuts. If you are unsure, stop and compare the blade shape with your photo from removal.
Place the blade with the correct side facing the deck. Most blades have a stamped marking or curved lift wing that helps move grass upward before it is cut. Install the bolt, washer, and spacer in the same order you removed them unless the manual shows a different arrangement.
- Slide the blade back into position.
- Hand-thread the bolt first so it does not cross-thread.
- Hold the blade with wood while tightening.
- Use a torque wrench if the manual gives a torque spec.
- Reconnect the spark plug wire or battery only after the mower is fully assembled.
One common mistake is overtightening with an impact tool and assuming tighter is safer. That can strip threads or make future removal difficult. Another mistake is forgetting the blade spacer, which can change cutting height and affect blade clearance.
Credit: lawnlove.com
Signs the blade should be replaced instead of sharpened
Sharpening is not the answer for every blade. If the steel is cracked, badly bent, or worn down too far, replacement is the safer choice. A damaged blade can break at high speed, and that is a serious hazard.
Replace the blade if you see:
- Cracks near the center hole or cutting edge
- Deep bends that do not straighten easily
- Large missing chunks
- Severe thinning from repeated sharpening
- Rust damage that weakens the metal
A practical rule: if you have already sharpened the blade many times and the cutting edge is getting narrow, a new blade often makes more sense. New blades are also helpful when the mower is older and the old blade has lost its original profile. This is one of the most overlooked parts of learning how to sharpen lawn mower blades well: sometimes the best result comes from replacing, not repairing.
How often to sharpen and what changes lawn health
For most homeowners, sharpening once or twice per mowing season is enough. If you mow sandy soil, hit sticks often, or mow large properties with hidden debris, you may need to sharpen more often. A blade can dull quickly after just a few rough sessions.
The best timing is often after about 20 to 25 hours of mowing, or whenever cut quality drops. That is more useful than waiting for the whole season to pass. Grass type matters too. Warm-season lawns and thick cool-season turf can show dull-blade damage faster because the mower has to process more volume at once.
Here is why this matters: dull blades do more than make the lawn look rough. They leave torn tips that lose moisture faster and can become more visible during heat or drought stress. Clean cuts heal faster, and that helps the lawn keep a more even green color.
For broader mowing and turf-care guidance, university extension resources are often the most reliable. Their advice is usually based on local grass conditions, not marketing claims from mower brands.
Common mistakes that ruin the result
Most bad sharpening jobs come from a few simple errors. The good news is that each one is easy to avoid once you know what to watch for.
Grinding too much metal
Removing too much metal shortens blade life and can upset balance. Use small passes and check progress often. If the edge looks good after a few strokes, stop.
Skipping balance checks
Even a sharp blade can shake the mower if the weight is uneven. Always check balance before reinstalling. This step is especially important after using a grinder.
Sharpening the wrong side
Some blades have a bevel on one side only. Sharpening the flat side changes the geometry and reduces performance. Match the original edge angle instead.
Ignoring nicks and cracks
Small chips can sometimes be smoothed out, but cracks are different. A crack can grow under vibration and stress. If you see one, replace the blade.
Reinstalling hardware in the wrong order
Washers, spacers, and bolts are not all interchangeable. If you lose track of the order, the blade may sit too high, too low, or crooked. Taking a quick photo during removal avoids a lot of guesswork later.
Final checks before you mow
Before starting the mower, spin the blade by hand if the model allows it. It should move freely without scraping. Listen for anything loose, and make sure the blade is secure, centered, and unobstructed.
Start the mower in an open area and watch for unusual vibration. A little noise is normal, but heavy shaking means the blade may be unbalanced, bent, or installed incorrectly. Stop right away if something feels off.
If you want the cleanest cut, mow when the grass is dry and avoid cutting more than one-third of the grass height at a time. Even a perfectly sharpened blade cannot fully fix mowing practices that stress the lawn. Sharp blades and correct mowing height work together.
When you get the process right, the difference is easy to see. The lawn looks smoother, clippings disperse better, and the mower runs with less effort. That is the real payoff of learning how to sharpen lawn mower blades the right way.
Credit: prestonlawn.com
FAQs
How often should I sharpen lawn mower blades?
Most homeowners should sharpen them once or twice per mowing season. If you mow sandy soil, hit debris often, or notice torn grass tips, sharpen sooner.
Can I sharpen a lawn mower blade without removing it?
It is possible in some cases, but it is not recommended. Removing the blade gives better control, safer handling, and a more accurate balance check.
What angle should a lawn mower blade be sharpened to?
Many blades use an angle around 30 to 40 degrees, but the exact shape depends on the blade design. The safest approach is to match the original factory bevel.
How do I know if my blade is balanced?
Use a blade balancer or hang the blade on a nail through the center hole. If one side drops, remove a little metal from that heavier side and test again.
When should I replace the blade instead of sharpening it?
Replace it if there are cracks, deep bends, large missing chunks, or severe thinning. A damaged blade is a safety risk and should not be reused.