A rough-cutting mower is often a blade problem, and learning how to balance mower blades is one of the easiest ways to fix it. A balanced blade helps the deck run smoother, reduces vibration, and gives the grass a cleaner cut.
This matters more than most mower owners think. An unbalanced blade can shake the spindle, wear out bearings faster, and leave jagged grass tips that turn brown after mowing. The good news is that balancing a mower blade does not take special skill, just a few careful steps and the right check.
If your mower vibrates, strips grass unevenly, or sounds harsher than usual, blade balance should be one of the first things you inspect. With a basic cone balancer or even a nail in the wall, you can check the blade in minutes and keep the mower running more safely.
Why blade balance changes the quality of the cut
A mower blade spins thousands of times per minute, so even a small weight difference matters. If one end of the blade is heavier, the spinning force pulls the deck off center and creates vibration. That vibration is what you feel in the handle, hear in the engine, and sometimes see in the grass.
A balanced blade does more than reduce shaking. It helps the blade stay at the correct angle through the full rotation, which means cleaner slicing instead of tearing. Clean cuts heal faster, so your lawn keeps a better color and looks more even after mowing.
There is also a safety side. When a mower vibrates too much, fasteners loosen faster and parts wear unevenly. Over time, that can lead to damaged spindles, cracked decks, and a blade that is harder to control.
What causes a blade to go out of balance
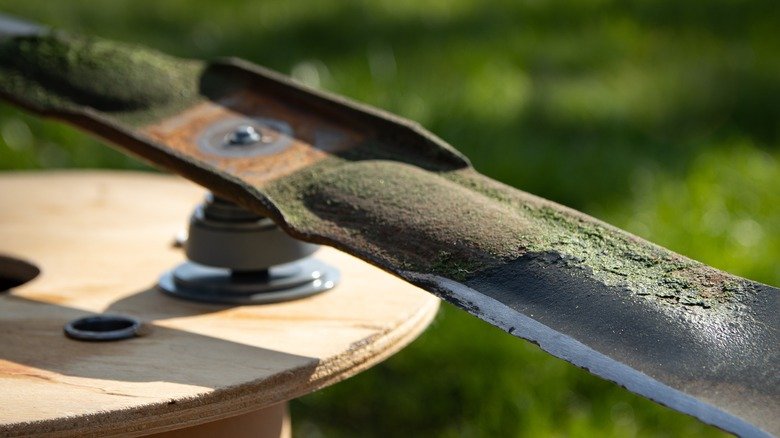
The most common cause is simple wear. Hitting rocks, roots, curb edges, or hidden debris can remove metal from one side of the blade. Sharpening can also create imbalance if more material comes off one end than the other.
Rust and thick buildup can change balance too. Wet grass, dirt, and caked-on clumps add weight in uneven spots, so a blade may seem balanced when it is not. This is one reason a dirty blade can still make a mower shake.
Another issue is blade replacement. A new blade is usually close to balanced from the factory, but small manufacturing differences still happen. If you install two blades on a riding mower, both should be checked, not just the one that looks damaged.
What you need before you start
You do not need a full shop to balance mower blades. In most cases, a few basic items are enough to do the job right and safely. The key is to work with the mower shut off, disconnected, and stable before touching the blade.
For safety, remove the spark plug wire on gas mowers or disconnect the battery on electric models. That step sounds simple, but it prevents accidental starts, which are a real risk when you are working near sharp metal. If your mower manual gives specific service guidance, follow that first; a manufacturer support page or lawn mower safety guidance from CPSC is also worth checking for safe handling basics.
Here is the small tool set that helps most:
- Wrench or socket set to remove the blade bolt
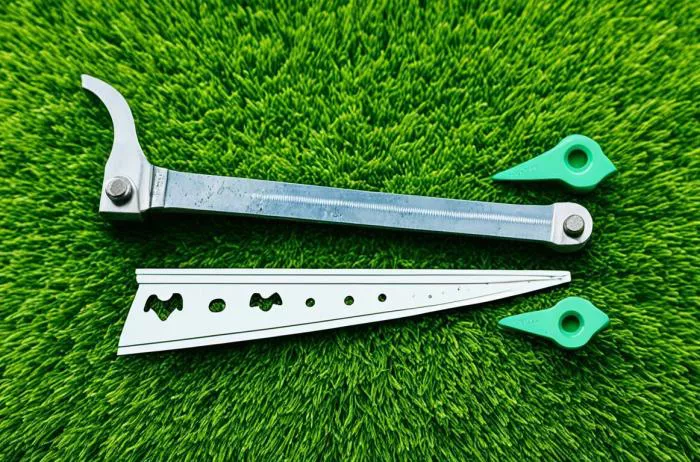
- Blade balancer, either cone-style or hanging type
- File or grinder for removing a little extra metal
- Work gloves to protect your hands
- Wood block or mower brace to hold the blade still
- Eye protection if you are grinding metal
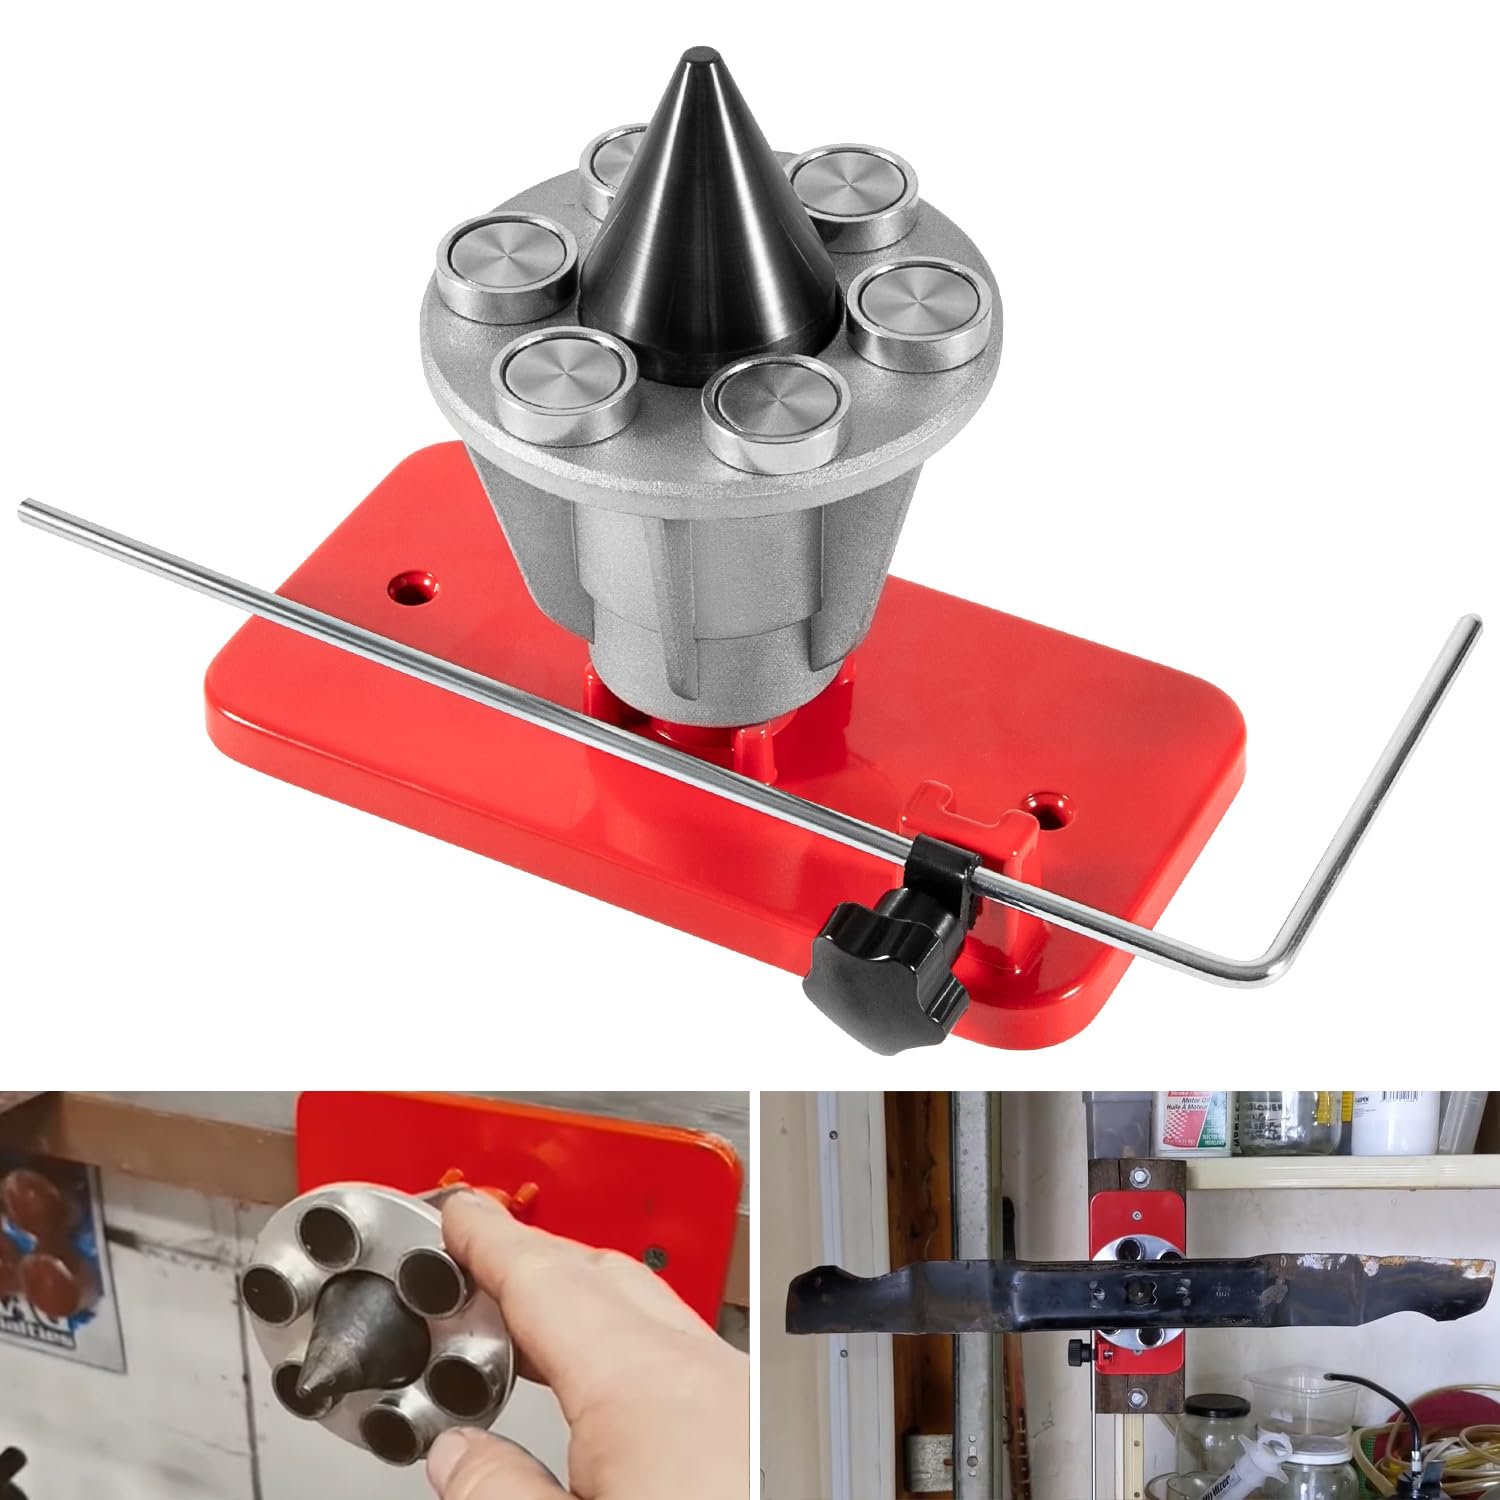
A blade balancer is not mandatory, but it makes the job faster and more accurate. A cone balancer shows which side is heavier by letting the blade tilt. A hanging balancer works well too and is often easier to store in a garage.
How to balance mower blades step by step
The process is straightforward, but doing it in the right order matters. Skip one step, and you may fix the edge while still leaving a hidden imbalance in the center or mounting area.
-
Remove the blade safely. Turn the mower off, disconnect power, and tip the mower only in the direction recommended by the manual. Mark the blade’s top side before removing it so you reinstall it correctly.
-
Clean the blade first. Scrape off grass, dirt, and rust before checking balance. A blade with packed debris can look balanced when it is not, which leads to a false reading.
-
Inspect for damage. Look for bends, chips, cracks, and large nicks. If the blade is bent or cracked, balancing will not fix it. A cracked blade should be replaced, not repaired.
-
Check the balance. Place the blade on a cone balancer or hang it on a nail through the center hole. If one side dips downward every time, that side is heavier.
-
Remove a small amount of metal from the heavy side. Use a file or grinder and take off just a little material near the cutting edge, not near the mounting hole. Make small passes, then check again.
-
Repeat until it sits level. Keep testing after each small adjustment. A balanced blade should stay close to level, with no obvious drop to one side.
-
Reinstall the blade correctly. Make sure the cutting edge faces the right direction. Tighten the bolt to the mower maker’s torque specification if available.
One non-obvious point: you should not grind the blade in one long session. Taking off too much metal at once can over-correct the balance and shorten blade life. Small adjustments are better, because a blade that is barely heavy on one side is easier to tune than one that has been over-ground.
Another point many people miss is that the center hole matters. If the blade hole is worn oval, the blade can test “balanced” on a balancer but still wobble on the spindle. That is why visible wear at the mounting point is a reason to replace the blade.
How to tell which side is too heavy
If you are using a balancer, the heavy side will rotate downward. That tells you where to remove metal. If the blade is hanging from a nail, let it settle fully before making a decision, because a blade can swing a few times before finding its true balance point.
The heavy side is not always the side with the biggest nick. Sometimes sharpening removed more metal from one side, while the other side still looks rougher. Trust the test, not just your eyes.
How much metal to remove
There is no exact universal number, but the rule is simple: remove the least amount possible, then test again. Usually a few passes with a file are enough. If you find yourself grinding a lot of steel just to fix balance, the blade may already be too damaged to keep using.
A useful guideline is this: if the imbalance seems large enough that the blade falls hard to one side, check for bends or missing chunks before trying to grind it true. Heavy imbalance often means the blade is no longer a good candidate for reuse.
How to balance mower blades without a special tool
You can balance mower blades at home even if you do not own a commercial balancer. The oldest method is to use a smooth nail or screw in a wall or board and place the center hole of the blade on it. The blade should stay nearly level when it is balanced.
Some people use a screwdriver through the center hole, but a straight nail or bolt works better because it gives less friction. Less friction means a more honest test. If the blade sticks to one position because of rubbing, the result is less reliable.
There are limits, though. A homemade setup is useful for normal maintenance, but if you are dealing with a heavily damaged blade, a bent mounting area, or repeated vibration after balancing, a proper balancer gives better proof. That saves time and reduces guesswork.
| Method | Best use | Accuracy | Main drawback |
|---|---|---|---|
| Cone balancer | Regular blade maintenance | High | Costs more than a nail |
| Hanging balancer | Frequent shop use | High | Needs storage space |
| Nail or bolt on a wall | Quick home check | Moderate | Less precise if setup is not level |
For most homeowners, the cone balancer is the easiest long-term choice because it is quick and repeatable. But if you only balance a blade once or twice a season, the wall method can still work well enough when used carefully.
Credit: xtoolreviews.com
Common mistakes that make blades feel balanced when they are not
One common mistake is checking balance before cleaning the blade. Dirt and grass make a difference, especially on smaller mower blades where even a few grams matter. A blade that seems balanced with debris on it may shake badly after it is cleaned and reinstalled.
Another mistake is grinding the wrong spot. The safest place to remove material is near the cutting edge on the heavy side, not near the center hole or the mounting area. Removing metal too close to the hole can weaken the blade and create fit problems.
Some owners also forget to check the blade for straightness. A blade can be balanced but still bent. That means it may spin without a wobble at rest, but once the mower is running, it cuts unevenly because the blade tip is not running on a flat plane.
Credit: amazon.com
Signs the problem is more than blade balance
If the mower still vibrates after balancing, the issue may be in the spindle, pulley, or crankshaft. If the blade looks true on a balancer but the mower deck still shakes, stop and inspect the rest of the cutting system. Replacing or repairing a bent spindle is not the same job as balancing a blade.
Watch for these clues:
- Vibration gets worse as engine speed increases
- Blade still wobbles after removal and recheck
- Cut quality changes after hitting a hard object
- Noise comes from one side of the deck, not the blade edge
How often to check and rebalance mower blades
For a typical homeowner, checking balance every time the blade is sharpened is a smart rule. If you mow rocky ground, hit debris often, or mow commercial hours, check more often. A blade can go out of balance faster than people expect, especially after one bad strike.
As a simple schedule, inspect the blade before the mowing season, after any impact, and whenever vibration feels different. If your mower runs 20 to 40 hours in a season, one or two blade checks may be enough. If it runs much more, checking every few sharpenings is wiser.
Cleaning the underside of the deck also helps balance problems show up sooner. A heavy buildup of grass can hide the real cause of vibration, so a clean deck makes diagnosis easier. That extra 10 minutes of cleaning often prevents a bigger repair later.
When to replace the blade instead of balancing it
Balancing is useful, but it does not rescue every blade. If the blade is cracked, deeply bent, or missing a large chunk of metal, replacement is the safer choice. A blade with structural damage can fail even if it seems balanced on the bench.
Replace the blade if you see any of these:
- Cracks near the center hole or cutting edge
- Large bends that do not straighten cleanly
- Worn or oval mounting hole
- Severe corrosion that has thinned the metal
- Repeated vibration after proper balancing
One helpful rule: if the blade needs too much grinding to become balanced, it is usually past its best use. A healthy blade should need only minor correction. Once too much metal is removed, the blade can become weaker and wear out faster.
Safety signs that mean stop now
If you see a crack, do not try to “finish the season” with that blade. Also stop if the blade looks warped after a hit, because a bent blade can put stress on the spindle and increase the chance of failure. Safety should come before squeezing a few more cuts out of worn hardware.
If you are unsure whether the blade is safe, compare it with the mower manufacturer’s service guidance and part specifications. Matching the correct blade type and size matters just as much as balance.
What a balanced blade changes on the lawn and on the mower
A balanced blade gives a cleaner finish because the cutting edge stays steady through each rotation. That steady motion matters especially on dry grass, tall grass, and thicker turf, where a shaky blade tends to tear more than slice. The result is a lawn that looks smoother and stays greener at the tips.
It also reduces stress on the machine. Less vibration means less wear on bolts, engine mounts, bearings, and deck hardware. That can extend the useful life of the mower, especially on walk-behind models where the handle and operator feel vibration directly.
There is one more benefit that people often overlook: a balanced blade can make the mower feel easier to control. When the deck is not shaking, the mower tracks more evenly, which reduces fatigue during longer mowing sessions. That is a small comfort that adds up over time.
For the best results, treat blade balance as part of normal mower care, not an occasional repair. Clean the blade, inspect it, balance it, and replace it when damage is too severe. If you follow that routine, you will get closer to the smooth, safe cut most mower owners want.
Credit: housedigest.com
Frequently asked questions
How do I know if my mower blade is out of balance?
The most common signs are strong vibration, a rougher sound, and uneven cutting. If the mower handle shakes more than usual or the grass tips look torn, the blade should be checked right away.
Can I sharpen a mower blade without balancing it?
You can, but you should not. Sharpening changes blade weight, and even a small difference can create vibration. Always check balance after sharpening so the mower runs smoothly and safely.
Is a nail in the wall a good enough balancer?
Yes, for basic home use it can work well if the nail is straight and the setup is level. A proper blade balancer is more accurate, but the nail method is still useful for quick checks.
Should both blades on a riding mower be balanced?
Yes. If your mower uses more than one blade, check each blade separately. One out-of-balance blade can still cause vibration even if the other blade is perfect.
How much vibration is too much after balancing?
If vibration remains strong after a correct balance check, the issue may be a bent spindle, damaged pulley, or warped blade mount. At that point, stop using the mower and inspect the rest of the cutting system before mowing again.