If you want to know how to change a lawn mower blade safely, the good news is that the job is simple when you follow the right steps. The main risks come from skipping safety checks, rushing the blade removal, or putting the blade back on the wrong way.
With a few basic tools and a careful process, most homeowners can do this in about 20 to 30 minutes. You will learn how to disconnect power, stop the blade from spinning, remove the old blade, install the new one, and test everything before you mow again.
Changing the blade at the right time also helps your lawn. A dull or damaged blade can tear grass instead of cutting it cleanly, which often leaves brown tips and adds stress to the turf.
What you need before you start
Before you touch the mower, gather everything first. That prevents the most common mistake: leaving the mower half-disassembled while you search for a wrench or socket.
The exact tools depend on your mower model, but most jobs only need a few basic items. If you can prepare the tools in advance, the process feels much easier and safer.
- A socket wrench or ratchet
- The correct socket size for the blade bolt, often 5/8 inch, 3/4 inch, or 15/16 inch
- A block of wood or a blade removal tool
- Work gloves
- Safety glasses
- A new mower blade that matches your mower model
- A rag or brush for cleaning grass buildup
If you are not sure which blade fits your mower, check the model number on the mower deck or frame. Even two blades that look similar may have a different center hole, length, or lift design.
For any mower safety concern, the official mower safety guidance from the U.S. Consumer Product Safety Commission is a good reference.
How to change a lawn mower blade safely in 7 steps
The safest way to handle this job is to work slowly and keep the blade from moving unexpectedly. Most injuries happen when the mower can still start, or when the blade is handled without gloves.
1. Shut off the mower and disconnect the power source
Turn the mower off completely. Then remove the spark plug wire if you have a gas mower. For a cordless electric mower, remove the battery. For a corded mower, unplug it from the outlet.
This step matters more than most people think. A mower can look “off” and still be dangerous if power is still connected. On gas mowers, removing the spark plug wire stops accidental starting. On battery models, removing the battery is the real safety lock.
2. Tilt the mower the right way
Carefully tip the mower so the air filter and carburetor side stay up if your manual says to do that. This helps keep fuel and oil from leaking into the engine intake. If you are unsure, check the owner’s manual before tipping it.
A common mistake is laying the mower on the wrong side. That can cause fuel leaks, oil contamination, and hard starting later. If the deck is very dirty, take a minute to brush off grass first so less debris falls into your face and hands.
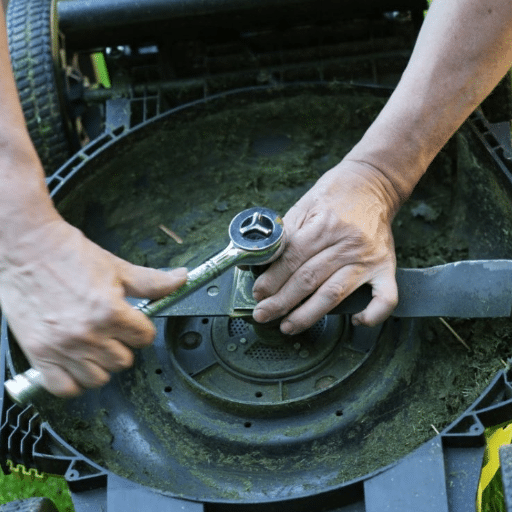
3. Keep the blade from spinning
Put a block of wood between the blade and the mower deck to stop the blade from turning. This gives you a stable hold while you loosen the bolt. You can also use a blade removal tool if you have one.
Do not grab the blade by hand, even with gloves, while loosening the bolt. The blade edge may still be sharp enough to cut skin, and it can slip suddenly when the bolt breaks free.
4. Remove the blade bolt and old blade
Use the correct socket and turn the bolt counterclockwise unless your mower manual says otherwise. Some bolts are tight from factory torque and may take steady force. If needed, use a longer ratchet handle for more leverage.
When the bolt comes off, keep track of the washer, adapter, spacer, or any curved hardware. Put the parts in order on the ground or on a rag so reassembly is easier. A small detail like a missing washer can cause vibration later.
5. Inspect the old blade and the blade mounting area
Look at the old blade before throwing it away. If the cutting edge is chipped, bent, or worn unevenly, that tells you a lot about mower performance. A blade that is cracked or badly bent should never be reused.
Also inspect the spindle, shaft, and underside of the mower deck. If you see heavy grass buildup or a dent near the blade area, clean it now. Small vibrations often come from grass packed under the deck, not just from the blade itself.
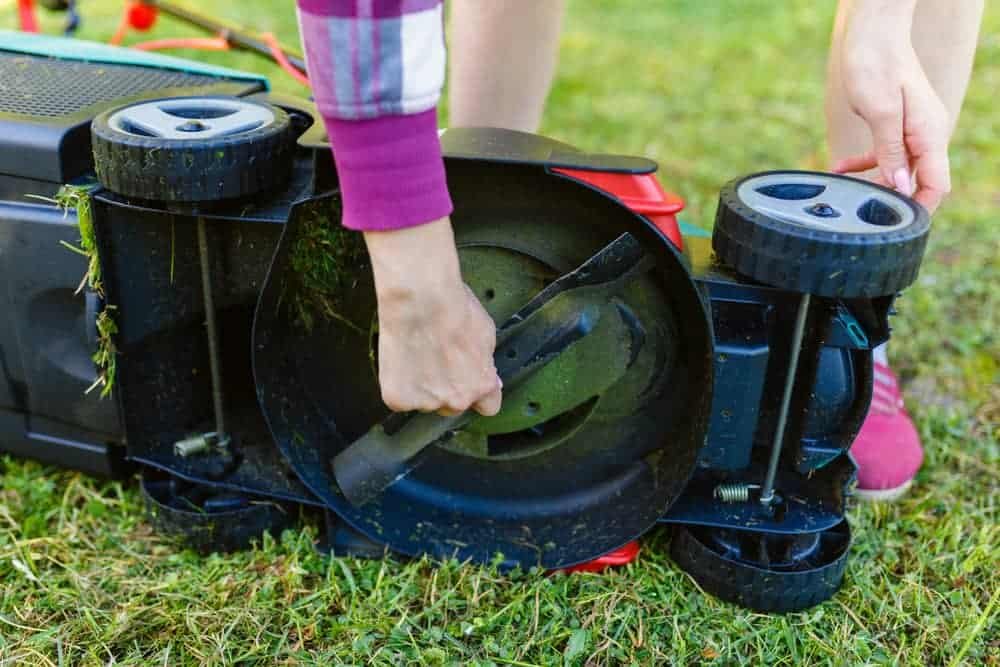
6. Install the new blade in the correct direction
Match the new blade to the old one by length, center hole, and shape. Most blades have a stamped word like grass side or bottom. If there is no marking, the curved cutting edge usually faces the direction of rotation, but check your mower manual to be sure.
This is where many people make a costly error. A blade installed upside down may still spin, but it cuts poorly and can leave ragged grass. Also, if the blade is directional, installing it backward changes how it lifts clippings into the bag or out the side discharge.
7. Tighten the bolt, reconnect power, and test
Reinstall the washer and bolt in the same order you removed them. Tighten the bolt securely with the wrench. Do not guess here. A loose blade can damage the mower deck and create a serious safety problem.
After tightening, remove the wood block and reconnect the spark plug wire, battery, or power cord. Before mowing grass, start the mower in a clear area and listen for unusual noise or vibration. If it shakes hard, shut it off and check the blade again.
How to make sure the blade is installed correctly
A correct installation is more than “the bolt is tight.” The blade should sit flat, spin freely without rubbing, and point the right way for your deck design.
One useful check is to stand behind the mower and look under the deck without starting it. The blade should appear centered, not tilted or crooked. If the blade looks off-center, the mounting hole may not be fully seated, or a spacer may be missing.
| Check | What you want to see | Why it matters |
|---|---|---|
| Blade direction | Edge faces the correct rotation direction | Gives a clean cut and proper lift |
| Bolt tightness | Secure, with no wobble | Prevents blade loosening during use |
| Blade fit | Matches center hole and length | Stops vibration and poor cutting |
| Deck clearance | No rubbing on the housing | Reduces noise and damage |
One less obvious detail: a blade can be the right size but still cut badly if it is slightly bent during shipping or storage. Roll it on a flat surface if you want a quick check. If it rocks, replace it before installation.
Credit: machine.goldsupplier.com
Common mistakes that make the job harder
Most blade changes go wrong for a few simple reasons. The good news is that all of them are easy to avoid once you know what to watch for.
Credit: machine.goldsupplier.com
Using the wrong blade
Not every blade that fits the bolt hole is the right blade. Length, lift, and center hole shape all matter. A mismatch can cause poor cut quality, extra engine load, or vibration.
Forgetting to lock the blade in place
If the blade spins while you loosen the bolt, the job becomes frustrating fast. The wood block is a simple fix, and it works on most walk-behind mowers. Skipping it often leads to scraped knuckles and stripped bolts.
Over-tightening or under-tightening
A bolt that is too loose is dangerous. A bolt that is over-tightened can damage threads or make the next blade change much harder. Tighten firmly, but do not force the bolt past resistance unless your manual specifies a torque value.
Ignoring damage under the deck
If the mower has hit a rock, root, or curb, the blade may not be the only damaged part. A bent spindle or warped deck can make a new blade look “bad” even when the blade is fine. That is why a quick inspection saves time later.
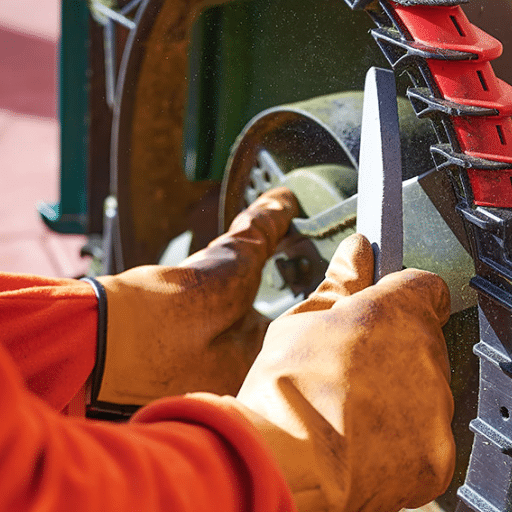
When to sharpen instead of replace
Not every blade needs replacement. If the blade is only dull and not bent, cracked, or worn down too far, sharpening may be enough. Many homeowners sharpen a blade a few times during the mowing season, depending on how often they mow and what kind of debris the lawn contains.
Replace the blade when you see deep chips, bends, cracks, or a worn cutting edge that no longer forms a clean line. If the mower hits stones often, replacement may be smarter than repeated sharpening. A badly damaged blade should not be repaired and reused.
Another non-obvious point: a blade that has been sharpened too many times can become out of balance because too much metal has been removed from one side. That can create vibration, even if the edge looks sharp. If a sharpened blade feels uneven, replace it.
How often to check the blade
For most homeowners, a quick blade inspection every 20 to 25 hours of mowing is a practical habit. If the lawn has lots of sticks, rocks, or sand, check it more often. A mower blade works hardest at the edge, and small damage builds up faster than many people expect.
You should also inspect the blade at the start of the season and before long mowing gaps. Grass that sits too high can force the mower to work harder, which makes a dull blade more obvious. Clean cuts are easier when the blade is sharp and balanced.
There is another benefit to regular checks: a cleaner cut helps the lawn recover faster. Torn grass loses moisture faster and can look brown at the tips for days.
Simple signs the blade needs attention
If you are unsure whether the blade is the problem, the mower often gives clues. Watch for these signs after mowing a small area.
- Grass looks frayed or shredded instead of cleanly cut
- The mower vibrates more than usual
- You hear a humming or rattling sound under the deck
- The lawn has uneven stripes or missed patches
- The engine slows down more than normal in average grass
These symptoms do not always mean the blade is bad, but they are strong clues. A clogged deck, loose bolt, or bent spindle can create similar problems. If the blade is new and the mower still shakes, look beyond the blade itself.
FAQs
Credit: lawn.com.au
How do I know which way the lawn mower blade goes on?
Look for a marking on the blade, such as “grass side” or “this side down.” If there is no marking, compare the new blade with the old one and check your mower manual. The cutting edge and curved lift side must face the correct direction for your deck.
Can I change a lawn mower blade without taking off the deck?
Yes, on many walk-behind mowers you can change the blade without removing the deck. You usually only need to tilt the mower safely, block the blade, and remove the center bolt. Some mower designs are different, so the manual still matters.
What size wrench do I need to change a mower blade?
There is no single size for every mower. Common sizes include 5/8 inch, 3/4 inch, and 15/16 inch. Check the bolt on your specific mower before starting so you do not waste time using the wrong socket.
Is it safe to use an impact wrench on a mower blade?
It can be safe if used carefully, but it is not necessary for most homeowners. A standard socket wrench gives you better control and lowers the risk of damaging the bolt or threads. If you do use power tools, keep the blade blocked and follow the mower manual.
What should I do if the blade bolt is stuck?
Use the correct socket first, then add steady leverage with a longer wrench handle. Spray penetrating oil only if the manual allows it and let it sit for a short time. If the bolt still will not move, stop before stripping it and consider a repair shop.
Once you know how to change a lawn mower blade the safe way, the job becomes routine. The key is simple: disconnect power, lock the blade, install the correct replacement, and test for vibration before mowing. That careful approach protects you, protects the mower, and helps the grass stay healthy.