If your Toro Recycler electric lawn mower will not start, stop, or cut properly, the cause is usually simple. The fastest fix is often a dead battery, a loose safety connection, or a clogged deck.
Knowing how to troubleshoot toro recycler electric lawn mower not working saves time and avoids random part swaps. Most problems can be found in a few minutes if you check power, safety switches, blade movement, and the mower deck in the right order.
The steps below follow the same logic a good technician uses: start with the most common causes, then move to deeper checks. You will also see when the issue is likely electrical, mechanical, or just a simple reset problem.
Quick checks for a Toro Recycler electric mower that will not work
| Symptom | Most likely cause | Fast check |
|---|---|---|
| Will not start | Battery, outlet, key, or safety bail not engaged | Confirm full charge, firm plug fit, key position, and handle engagement. |
| Starts then stops | Overheating, weak battery, or clogged deck | Let it cool, recharge the battery, and clear wet grass from under the deck. |
| Safety handle feels stuck | Bail cable or start switch is not returning cleanly | Release the handle, inspect cable movement, and look for debris near the switch. |
| Motor hums but blade will not spin | Blade jam, bent blade, or packed underside | Remove the battery or unplug power, then check the blade path and deck. |
Start with the most likely cause
When a Toro Recycler electric mower is not working, the most common cause is power loss. That can mean a weak battery, a tripped breaker, a damaged cord on corded models, or a charger that is not actually charging. Many owners skip this step and go straight to the blade or motor, but power problems explain a large share of “dead mower” complaints.
Before opening anything, do a quick visual check. Look for a loose battery, damaged plug, bent safety key, wet connections, or a clogged cutting deck. A mower that seems “dead” is sometimes only blocked by a safety interlock.
If your mower ran for a few minutes and then quit, that points to a different issue than a mower that never started at all. Sudden shutdown often means overheating, battery protection mode, or a jammed blade. A no-start problem is more often a power or safety circuit issue.
What to check first
- Battery charge on cordless models
- Power cord and outlet on corded models
- Safety key or start button position
- Handle position and operator presence lever
- Blade and deck for grass buildup or blockage
If the mower still will not respond after these fast checks, move into a more exact diagnosis. That keeps you from replacing parts that are not the real problem.
Check the power source before anything else
For a cordless Toro Recycler, remove the battery and inspect the contacts. Dirt, moisture, or a battery that is not fully seated can stop the mower completely. Reinsert the battery firmly until it clicks, then try again.
For a corded model, test the outlet with another device. If the outlet works, inspect the full length of the cord for cuts, bent plugs, or loose connections. Extension cords can also cause trouble if they are too long or too light for the mower’s current draw.
A useful rule: if the battery indicator shows full but the mower dies under load, the battery may still be weak. Voltage can look normal at rest and fail when the motor asks for more power. That is one reason a battery can “look charged” and still not run the mower.
Battery-specific checks
- Remove the battery and wait 30 seconds.
- Inspect the battery terminals for debris or corrosion.
- Reinstall the battery fully.
- Charge it with the correct Toro charger until the indicator shows a full charge.
- Try a second battery if you have one.
Corded-model checks
- Confirm the outlet has power.
- Check the cord for damage along its full length.
- Make sure any extension cord is outdoor-rated and heavy enough for the mower.
- Press the reset if your model includes one.
If you need the official owner’s instructions for your exact model, Toro’s official owner support page is the safest place to confirm battery, cord, and reset procedures.
Make sure the safety system is allowing the mower to run
Electric mowers use safety interlocks. These are switches and levers that prevent accidental starts. If one of them is not engaged, the mower may appear broken even though it is working as designed.
On many Toro Recycler electric mowers, the operator must hold the handle correctly, insert the safety key, and use the start control in the right sequence. If the handle is not locked in place or the key is not fully inserted, the motor will not start.
This is where many people get stuck. They assume the motor failed, but the mower is simply not receiving the “safe to run” signal. That is why a careful check beats repeated start attempts.
Safety checks that commonly stop startup
- Handle not fully raised or locked
- Safety key missing or not seated
- Start bar not held long enough
- Blade control lever not fully engaged
- Grass bag or rear discharge part not installed correctly, if your model uses one
How to test the safety chain
- Remove the battery or disconnect power first.
- Inspect the handle and folding points for proper locking.
- Insert the safety key fully.
- Reconnect power and try the start sequence exactly as directed by the mower label or manual.
- If the mower works only when the handle is pushed hard, a switch or latch may be misaligned.
Non-obvious issue: a slightly bent handle bracket can break the safety circuit even when everything looks normal. That is easy to miss because the mower still “feels” assembled correctly.
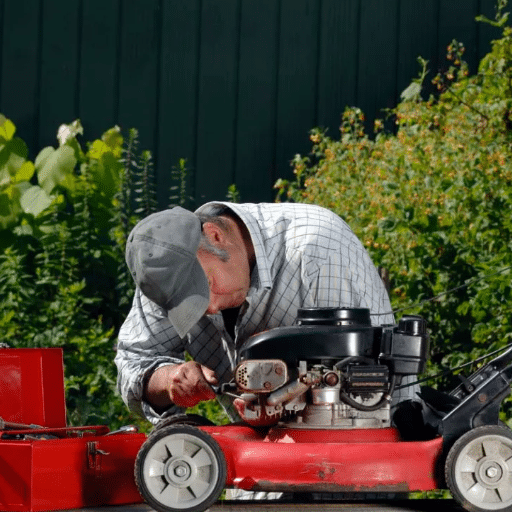
Inspect the blade, deck, and underside for jams
If the mower hums, stops quickly, or tries to start and then shuts down, check for a jammed blade. Wet grass, packed clippings, sticks, and string can stop the blade from turning freely. The motor may shut off to protect itself.
A clogged deck also reduces airflow. That matters on a Recycler mower because the design depends on airflow to move grass through the cutting chamber. When airflow is blocked, cutting quality drops and the motor works harder.
Always disconnect power before touching the blade area. Even electric mowers can start unexpectedly if the safety system is bypassed or if the start control is triggered accidentally.
Credit: machine.goldsupplier.com
What to inspect under the deck
- Heavy grass buildup
- Wrapped string or vines around the blade shaft
- Bent or dull blade
- Stuck wheel causing drag
- Debris blocking the discharge area
Cleaning and clearing the deck
- Remove the battery or unplug the mower.
- Tip the mower only as directed by the manufacturer.
- Scrape off packed grass with a plastic tool or wooden scraper.
- Check that the blade spins freely by hand, if safe to do so.
- Remove wrapped debris from the blade and shaft area.
Do not use water to wash into the motor housing or battery compartment. Moisture inside electrical parts can create a new problem that is harder to diagnose than the original one.
Test the blade system and motor behavior
The way the mower behaves during startup tells you a lot. A complete lack of sound usually points to power or safety issues. A brief hum, click, or shutoff often points to overload, jam, or a failing motor controller.
On some electric mowers, the blade and motor are protected by overload sensors. If the blade cannot spin freely, the system may shut down within seconds. That is not random. It is the mower protecting its electronics and battery.
If the blade feels stiff when rotated by hand, stop there. A stiff blade can come from debris, a bent blade, or internal motor resistance. Forcing repeated starts can make the damage worse.
Signs of a blade or motor problem
- Motor starts, then stops immediately
- Burning smell from the deck or motor area
- Grinding or scraping sound
- Blade does not spin freely
- Mower cuts poorly even when it runs
Simple diagnostic split
| Symptom | Likely cause | First action |
|---|---|---|
| No sound at all | Power or safety circuit | Check battery, cord, key, and handle |
| Click or short hum | Jammed blade or overload | Clear deck and test blade spin |
| Runs briefly, then stops | Heat buildup or weak battery | Let it cool and test charge condition |
| Runs but cuts badly | Dull blade or clogged deck | Sharpen or replace blade, clean underside |
One detail many owners miss: a dull blade can make the mower seem underpowered even when the motor is fine. The motor has to work harder, battery life drops faster, and the mower may shut off early under thick grass.
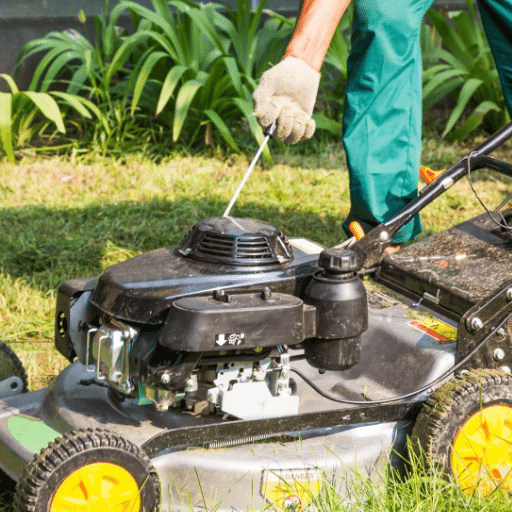
Look for overheating, battery protection, and hidden resets
Electric mowers often shut down after heavy use, thick grass, or repeated starts. That does not always mean a failure. Many batteries and controllers have protection modes that stop operation when temperature or current gets too high.
If the mower stopped after 10 to 20 minutes in dense grass, let it cool for 15 to 30 minutes before testing again. A battery can also refuse to run until it cools or warms back into its safe range.
This is especially common when mowing tall or wet grass. The mower may be fine in light conditions but fail when the load climbs. That makes it look random, when it is actually load-related.
Credit: gardensgym.com
How to tell if overheating is the issue
- Mower works again after a cooling break
- Battery feels hot to the touch
- Motor housing is warmer than normal
- Failure happens only in thick or wet grass
What to do next
- Turn the mower off and remove the battery.
- Let the unit cool in a shaded, dry place.
- Check the deck for packed grass again.
- Try a shorter mowing session in dry grass.
- If the problem repeats quickly, test with another battery or seek service.
Do not keep restarting a hot mower over and over. Repeated attempts can strain the controller and battery more than the original problem did.
Find mechanical issues that are easy to miss
Not every “not working” problem is electrical. Sometimes the mower has drag. A wheel may be stuck, a height adjustment may be uneven, or a blade may be slightly bent and rubbing the deck.
These problems often show up as weak performance rather than total failure. The mower may start, then bog down, or it may cut in one section but stall in another. That makes the issue feel confusing until you inspect the moving parts.
Check all four wheels for free movement and verify that the cutting height is even on both sides. If one wheel is jammed or the deck sits crooked, the blade may hit grass or debris more aggressively on one side.
Mechanical causes to check
- Stiff wheel bearings or debris in the wheels
- Uneven cutting height settings
- Bent blade
- Loose blade bolt
- Deck contact with hard objects
Non-obvious insight: a slightly bent blade can create a vibration strong enough to trigger an internal protection shutdown. The mower does not always announce the real cause. It just turns off to prevent damage.
When the problem is likely internal and needs service
If you have checked power, safety, blade movement, and cooling, but the mower still will not run, the fault may be inside the motor, controller, or wiring harness. At that point, DIY repair depends on your comfort level and the warranty status of the mower.
Signs of an internal issue include repeated shutdowns with a good battery, a burning smell, sparks, or a mower that is completely dead even with confirmed power. If the motor clicks but never spins, the controller or motor may be failing.
This is also the point where opening sealed electrical housings can create more trouble than it solves. Water resistance, insulation, and wiring layout matter. A wrong repair can turn a small fault into a major one.
Call for service if you see any of these
- Burning smell from the motor area
- Visible melted plastic or wire damage
- Sparks, smoke, or repeated breaker trips
- Mower shuts off immediately with a known good battery
- Blade and deck are clear, but the motor stays silent
If the mower is still under warranty, avoid opening sealed components unless the manual clearly allows it. Warranty terms can be affected by unauthorized repair attempts.
Use this order to avoid wasted time
The best troubleshooting order is simple: start with power, then safety switches, then blade and deck blockage, then overheating, then mechanical drag, and finally internal electrical failure. That sequence matches the most common real-world causes.
It also helps you avoid the biggest mistake people make: replacing batteries, blades, or switches before confirming the basics. A dirty deck or loose safety key can look like a dead motor if you skip the early checks.
When you work in a clean order, you learn more from each test. That makes the next step obvious instead of random.
If you want a practical shortcut, use this mindset: no sound usually means power or safety, brief sound then stop usually means jam or overload, and runs badly usually means blade, deck, or drag.
Credit: machine.goldsupplier.com
How to prevent the same issue next time
Regular care prevents most no-start problems on electric mowers. Clean the underside after each use, especially when cutting damp grass. Keep the battery charged according to the manufacturer’s guidance, and store it in a dry place.
Sharpen or replace the blade before it gets too dull. A sharp blade reduces load, improves cut quality, and lowers the chance of motor shutdown. Also check the handle latches and safety key area every few uses, because loose parts can slowly create startup problems.
On mowing day, avoid cutting grass that is too tall in one pass. If the lawn is very thick, make two passes at a higher setting first. That lowers motor strain and keeps the protection system from shutting down.
Good maintenance is not just about performance. It also reduces the chance of electrical stress, overheated parts, and unnecessary battery wear over time.
FAQ
Why does my Toro Recycler electric lawn mower not turn on at all?
The most common reason is a power or safety issue. Check the battery charge, safety key, handle position, outlet, and cord before looking at internal parts.
Why does the mower start and then stop after a few seconds?
That usually means a jammed blade, heavy grass buildup, overheating, or a weak battery. Clear the deck and let the mower cool before trying again.
Can a dull blade make the mower stop working?
Yes. A dull blade increases load, which can make the motor work harder and trigger shutdown. It also leaves a poor cut even when the mower still runs.
Should I wash the underside of the mower with a hose?
Do not spray water into the motor, battery area, or electrical connectors. Clean packed grass with a plastic or wooden scraper instead, and follow the owner’s manual for safe cleaning steps.
When should I stop troubleshooting and get service help?
Stop if you smell burning, see sparks, notice melted parts, or the mower stays dead with a known good battery and clear deck. Those signs point to an internal electrical fault.