If your machine starts slipping, squealing, or losing drive power, the first place to look is often the belt system. For many owners, raptor sd drive belt problems show up suddenly, but the real cause usually builds up over time. Heat, dust, bad tension, and worn pulleys can all make a belt fail sooner than expected.
The good news is that most belt issues are easy to diagnose if you know what to check first. You do not need to guess, and you do not need to replace parts at random. With a simple inspection routine, you can find the source of the problem, fix it the right way, and reduce the chance of repeat failures.
This guide explains the main causes of belt trouble, the best fixes, and the habits that help prevent damage. It is written for owners who want clear answers, practical steps, and a better understanding of how the drive system works.
What the drive belt actually does
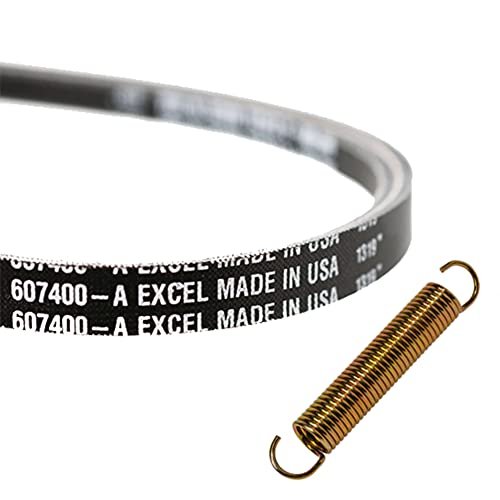
The drive belt transfers power from the engine to the drivetrain. In simple terms, it helps your machine move the way it should. When the belt is healthy, power transfer feels smooth and steady. When it starts to fail, you may notice weak acceleration, jerky movement, noise, or a burning smell.
Many people think a belt is just a rubber loop. In reality, it is a carefully built part with layers, cords, and a shape designed to grip pulleys under load. That means small problems like heat glazing or pulley misalignment can cause big performance issues.
One important point beginners often miss is this: a belt can look fine from the outside and still be failing inside. Hidden cord damage or heat hardening can reduce grip long before the belt breaks.
Common signs of belt trouble
Before you can fix the issue, you need to recognize the warning signs. The sooner you catch them, the less damage the rest of the system may suffer.
- Squealing or chirping during acceleration or under load
- Slipping, where the machine feels weak or unresponsive
- Burning rubber smell, especially after hard use
- Visible cracks or frayed edges on the belt
- Glazed belt surface that looks shiny and hard
- Uneven wear on one side of the belt
- Vibration or a pulsing feel while driving
Not every symptom means the belt itself is bad. A damaged pulley, dirty belt path, or weak tensioner can create the same results. That is why a full check matters.
Main causes of raptor sd drive belt problems
1. Wrong belt tension
If the belt is too loose, it slips. If it is too tight, it wears fast and puts stress on bearings and shafts. Both situations shorten belt life. Correct tension helps the belt grip without being overstressed.
A common mistake is adjusting tension by feel only. That often leads to poor results. Use the machine’s service guide when possible, because the correct setup is usually more specific than people expect.
2. Heat buildup
Heat is one of the biggest enemies of any drive belt. Hard use, repeated stop-and-go work, or poor ventilation around the belt area can make the belt overheat. Once the belt gets too hot, the rubber can harden and glaze. A glazed belt loses grip and starts slipping even more, which creates more heat. This cycle can damage the belt very quickly.
3. Dirty pulleys and belt path
Dust, grass, oil, and debris can collect on pulleys. Even a small amount of contamination can reduce friction. Oil is especially harmful because it weakens rubber and can cause the belt to swell or slip.
One non-obvious issue many owners miss is that cleaning only the belt is not enough. If the pulley grooves are dirty or oily, the new belt can still fail early.
4. Misaligned pulleys
When pulleys are not lined up properly, the belt runs crooked. That causes edge wear, extra friction, and unstable movement. Misalignment may come from a bent bracket, worn mounting point, or a part that was replaced without checking the full alignment.
Even a small offset can create repeated belt problems. If a new belt keeps wearing on one side, alignment should be one of the first things to inspect.
5. Worn idler or tensioner parts
The belt does not work alone. Idler pulleys, tensioners, and bearings all affect belt performance. If one of these parts sticks, wobbles, or develops rough movement, the belt may ride poorly or lose proper tension.
This is another beginner trap: replacing the belt without checking the support parts. If the old tensioner is weak, the new belt may fail almost as fast as the first one.
6. Operating habits that overload the system
Heavy loads, aggressive starts, repeated high-speed changes, or long use without pause can strain the belt. Some belt failures are not due to bad parts at all. They happen because the machine is being used beyond what the drive system can handle comfortably.
Using the right mode, keeping loads within limits, and giving the system time to cool can make a big difference.
How to inspect the belt the right way
A careful inspection can save time and money. Start with a clean, safe machine and good lighting. If you can, let the system cool before checking.
- Turn off the machine and disconnect power if the design allows it safely.
- Open the belt access area and remove loose dirt or debris.
- Look at the belt surface for cracks, shine, glazing, missing chunks, or frayed cords.
- Check both belt edges for uneven wear or rubbing.
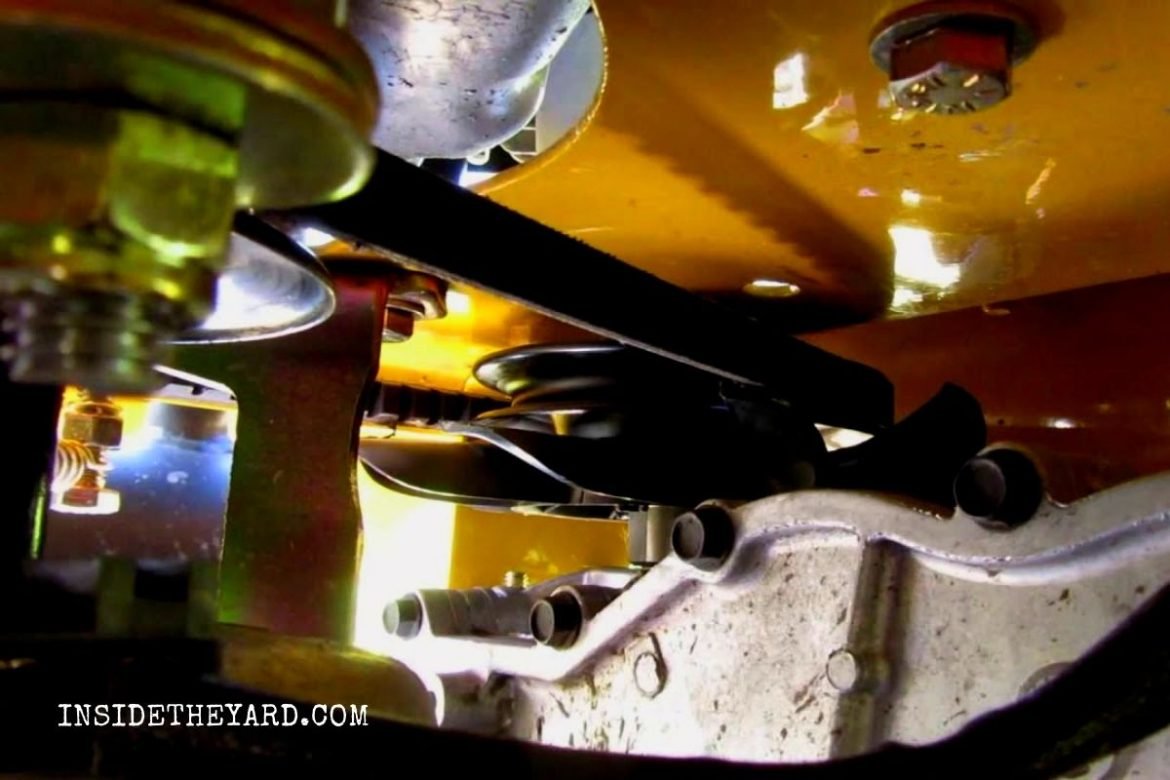
- Inspect pulleys for damage, rust, dirt, oil, or wobble.
- Spin idlers and tensioners by hand if safe, and feel for roughness or sticking.
- Compare belt position to the pulley center line and look for visible misalignment.
If the belt is badly cracked, shiny, stretched, or contaminated with oil, replacement is usually the best move. If the belt looks normal but performance is still poor, the problem may be in the pulleys or tension system.
Credit: nohomedesign.com
Best fixes for common belt issues
Fix slipping caused by wear or glazing
If the belt has glazed, hardened, or worn smooth, cleaning alone will not restore its grip. In most cases, replacement is the right fix. A fresh belt with the correct size and specification performs better than an old one that has already lost its flexibility.
After replacement, check why the old belt glazed. Heat, a weak tensioner, or pulley drag may have caused it. If you skip that step, the new belt may develop the same problem.
Fix noise from pulley or tension issues
Squealing often points to a slipping belt, but it can also point to a pulley that is not turning freely. Clean the pulley surfaces, inspect for wear, and replace any bearing that feels rough or noisy.
If the belt noise appears only at startup, the tension system may be slow to respond. If it happens under load, the belt may be slipping because of wear or incorrect tension.
Fix edge wear and belt wandering
Edge wear is usually a sign of misalignment, a damaged pulley, or a belt that is not sitting correctly in its track. Check the mounting points and make sure every pulley is square and secure. Replace bent hardware and worn pulleys as needed.
Do not trim the belt edge or try to “wear it in” by using the machine longer. Edge damage usually gets worse, not better.
Fix contamination from oil or debris
If the belt has been soaked with oil or coolant, replacement is usually safest. Belt materials can absorb contaminants, which weakens them from within. Clean the source of the leak before fitting a new belt, or the problem will come back.
For dry dirt and debris, clean the belt path and pulley grooves carefully. Use only methods recommended by the manufacturer. Some chemicals can damage rubber faster than the dirt itself.
Fix tension problems
Adjust tension only after checking the service information for the correct setting. Too much tension can be just as harmful as too little. After adjustment, run the machine briefly and recheck the belt position and feel.
If the tension keeps changing, the tensioner spring, pivot point, or mounting hardware may be worn. In that case, replacing the belt alone will not solve the issue.
Parts that should be checked with the belt
The belt is only one part of the system. If you want a lasting repair, inspect the support parts too.
| Part | Why it matters | What to look for |
|---|---|---|
| Pulleys | They guide and grip the belt | Wear, grooves, wobble, rust, dirt |
| Idlers | They keep the belt path stable | Rough spin, noise, looseness |
| Tensioner | It keeps the belt at the right tightness | Weak spring, sticking arm, poor movement |
| Bearings | They reduce drag and heat | Grinding, play, heat, noise |
| Mounting points | They keep alignment correct | Cracks, bends, missing bolts |
A new belt installed over worn pulleys is a short-term fix. The machine may feel better for a while, but the real problem stays in place.

Credit: insidetheyard.com
How to prevent belt failure
Keep the belt area clean
Regular cleaning is one of the simplest and most effective habits. Remove dust, grass, and debris before they build up. A clean drive area runs cooler and places less stress on the belt.
Follow the correct belt size and spec
Not every belt that “fits” is the right belt. Length, width, profile, and material all matter. A wrong-spec belt may work for a short time, then slip, overheat, or wear unevenly. Always match the replacement to the machine’s requirements.
Watch operating temperature
If the system runs hot often, give it time to cool between hard jobs. Heat is not just a comfort issue. It changes belt behavior and shortens service life. In many cases, cooling breaks are cheaper than repeated belt replacements.
Inspect before damage gets serious
A quick inspection every so often can catch small changes early. Look for shine, cracks, and dust buildup. Check for pulley wobble and listen for new noises. These early signs are much easier to fix than a full belt failure.
A useful habit most owners skip
After any belt replacement, recheck the system after a short period of use. A new belt may settle slightly as it starts running. If you do not inspect it again, a small tension change or hardware shift can go unnoticed until the belt starts slipping.
When replacement is better than repair
Some belt problems can be solved with cleaning or adjustment. Others cannot. If the belt has cracks, missing material, heat glazing, oil damage, or stretched cords, replacement is usually the right choice. The same is true if the belt has already failed more than once for the same reason.
If the belt is new but the system still performs badly, look beyond the belt. That usually means the issue is in alignment, tension, or another drive component. Replacing parts one by one without diagnosis often wastes money.
For deeper belt service guidance and general mechanical safety ideas, a good reference is the Occupational Safety and Health Administration. It is not belt-specific, but it is helpful for safe maintenance habits and equipment handling.
Simple maintenance schedule that helps a lot
You do not need a complicated plan. A light, regular routine is enough for many owners.
- Before use: look for obvious dirt, leaks, or strange noises
- After heavy use: check for heat smell, slippage, or dust buildup
- Every few weeks: inspect belt surface, pulleys, and tensioner movement
- After replacement: recheck fit, alignment, and tension after the first run
This simple routine helps you catch the common causes of raptor sd drive belt problems before they grow into expensive failures.
Credit: insidetheyard.com
Final thoughts
Most belt problems do not appear out of nowhere. They are usually the result of heat, tension issues, contamination, misalignment, or worn support parts. Once you understand that, solving the problem becomes much easier. Instead of guessing, you can inspect the right areas and make the right fix the first time.
If you want reliable performance, think of the belt as part of a full system, not a single part. Clean it, inspect it, keep the pulleys aligned, and replace worn hardware before it damages the new belt. That is the simplest way to reduce repeat failures and keep the drive system working smoothly.
FAQs
1. What are the most common signs of raptor sd drive belt problems?
The most common signs are squealing, slipping, burning rubber smell, vibration, cracked rubber, glazed surfaces, and weak drive response. If you notice more than one of these, inspect the whole belt system.
2. Can I keep using a belt if it only looks a little worn?
Sometimes, but not always. Small surface wear may be fine for a short time, but cracks, oil damage, glazing, or edge fraying usually mean the belt should be replaced soon.
3. Why does a new belt fail so quickly?
A new belt can fail fast if the real problem was never fixed. Common reasons include bad tension, pulley misalignment, rough bearings, dirt, or a weak tensioner.
4. Is it safe to clean a drive belt with spray cleaners?
Only use cleaners approved by the machine maker. Some sprays damage rubber, soften the belt, or leave a slippery film. When in doubt, clean the belt path and pulleys with safe methods and replace a contaminated belt if needed.
5. How often should I inspect the belt system?
A quick check before use and a deeper inspection after heavy use is a smart habit. For regular maintenance, inspect the belt system every few weeks, or sooner if you hear noise or feel slipping.