If you want a new garden bed, the first real job is learning how to remove sod for a garden without making the ground harder to work later. The good news: you do not need special equipment for a small yard, but you do need the right method.
Done well, sod removal saves time, reduces regrowth, and gives your plants a cleaner start. Done badly, it leaves thick grass roots behind, wastes energy, and creates a patchy bed that keeps sprouting weeds and lawn grass.
The process is simple once you understand the order: prepare the area, choose a removal method, cut the sod in strips or squares, lift it cleanly, and finish the soil so it is ready for planting. A few smart choices up front can save you hours later.
Start with the right garden layout
Before you cut anything, decide exactly where the garden will go. This sounds basic, but many people start removing sod too soon and then change the shape later, which wastes effort. Mark the borders with spray paint, rope, a hose, or wooden stakes.
Measure the bed if you can. A 10-by-12-foot garden is 120 square feet, which helps you estimate labor, tools, and disposal. Even a small 50-square-foot bed can feel much bigger once you start lifting wet sod by hand, so a clear outline keeps the job manageable.
Check the sun, drainage, and tree roots before you begin. If water pools in the area after rain, you may need to improve drainage before planting. If large roots are near the surface, use extra care so you do not damage trees or make the garden bed uneven.
Also call utility location services before digging if there is any chance of buried lines. In the U.S., you can use official lawn and garden tool safety guidance and local utility marking services to reduce risk before using sharp tools.
Choose the best way to remove the sod
There are three common methods, and the best one depends on your time, tools, and soil conditions. For most home gardens, cutting and lifting the sod is the fastest and cleanest option. For larger areas, a sod cutter can save your back and give more even results.
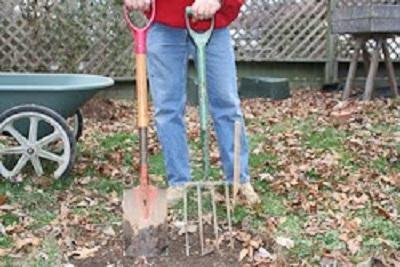
1. Cut and lift by hand
This method works well for beds under about 150 square feet. Use a flat spade, edging knife, or sharp shovel. Cut the sod into strips about 12 inches wide or into squares, then slide the blade under each section and lift it.
The advantage is control. You can work around curves, trees, and narrow spaces. The downside is effort. Fresh, moist sod can be heavy, and thick turf with dense roots can double the strain on your wrists and lower back.
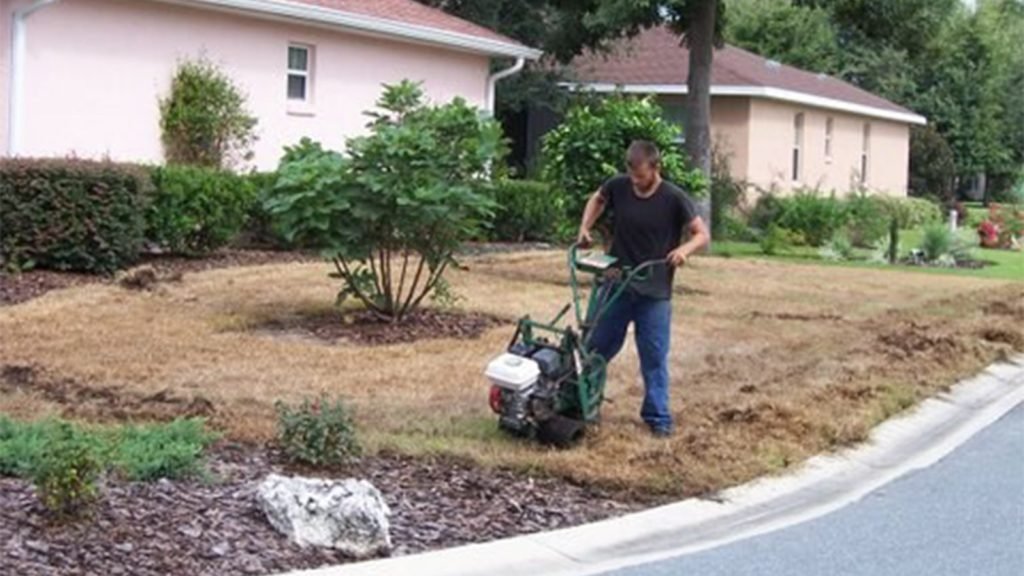
2. Use a sod cutter
A sod cutter is best for larger gardens or when you want a cleaner, more uniform removal depth. It slices beneath the roots and rolls the sod into manageable strips. Many rental machines cut 12 to 18 inches wide and remove sod at a shallow depth of about 1 to 2 inches.
This method is more efficient for a big project, but it requires practice on a small test section. If the blade is set too deep, you remove extra soil. If it is too shallow, roots stay behind and grass can return.
3. Smother the grass first
If you are not in a rush, you can kill the sod before removal. Cover the area with cardboard, thick mulch, or black plastic for several weeks to several months. This softens the turf and weakens the roots.
This option is slower, but it reduces labor. It is useful when the existing grass is very thick or when you want to avoid heavy digging. The tradeoff is time, and some gardeners do not like waiting that long to start planting.
| Method | Best for | Main advantage | Main drawback |
|---|---|---|---|
| Cut and lift by hand | Small to medium beds | Low cost and high control | Physically tiring |
| Sod cutter | Larger areas | Fast, even removal | Rental cost and learning curve |
| Smothering | Flexible timelines | Low labor | Slowest method |
Gather the tools that actually help
You do not need a long tool list, but the right few items make a big difference. For hand removal, a sharp spade, square-edged shovel, garden knife, and work gloves are the basics. A wheelbarrow or tarp helps move sod pieces without making a mess.
If you rent a sod cutter, also get heavy gloves, closed-toe shoes, and eye protection. A sod cutter is simple to use, but the blade is still a cutting tool. Stable footing matters because uneven soil can make the machine lurch or dig unevenly.
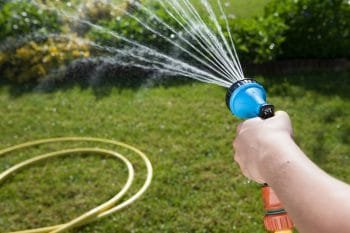
Water is another useful tool. Slightly moist soil separates more cleanly than dry, hard soil, and it is easier to cut through roots when the ground has a little give. Avoid working after a heavy rain, though, because muddy soil clumps and becomes much harder to handle.
One non-obvious point many beginners miss: dull tools cause more damage than sharp ones. A blunt shovel tears roots instead of slicing them, which leaves rough edges and makes the job slower. Sharpen the blade before you begin if you are using hand tools.
Credit: extension.umd.edu
Mark, score, and cut the sod in a controlled pattern
Once the area is ready, start by scoring the lawn into sections. Long, straight cuts are easier to lift than random patches. For hand removal, a 12-inch strip width is a practical size because it balances control and weight.
Press the spade straight down along your marked lines. Then angle the blade slightly under the sod to separate the root layer from the soil below. Try to keep the cut depth shallow and even, usually around 1 to 2 inches, so you remove the grass and roots without wasting good topsoil.
If the grass is thick, make two passes. The first pass creates a clean edge, and the second slides underneath. This is often easier than trying to pry up a wide section in one motion, especially in clay soil.
For a sod cutter, make a short test strip first. Check whether the blade is taking only the turf layer, not several inches of soil. A clean strip should roll or fold without pulling up a thick slab of dirt.
Work in small sections
Do not remove the whole lawn at once unless the space is small. Work in sections about 3 to 4 feet wide so you can keep your footing clear and move the removed sod without stepping on the finished area. This also helps keep your outline visible.
Small sections are easier to transport. A full strip of sod can weigh far more than expected once it contains moisture and soil. Shorter pieces reduce strain and lower the chance of dropping clumps back into the bed.
Keep the blade angle consistent
Changing the angle too often creates uneven cuts. If you dig too deep, you lose topsoil and may expose lower-quality dirt. If you stay too shallow, grass runners remain and can grow back through the new garden.
A steady angle is one of the biggest differences between a neat garden bed and a patchy one. Many new gardeners focus on speed, but clean cutting saves time later because you spend less effort fixing uneven edges.
Lift, roll, and remove the sod cleanly
After the sod is cut, slide the shovel or spade under one edge and lift it in a smooth motion. If the section is large, roll it like a carpet rather than trying to carry a flat slab. This reduces breakage and makes disposal easier.
Flip the sod grass-side down if you plan to compost it in place or stack it for reuse. Grass-side down helps weaken the turf. If you want to recycle it later, keep the pieces fairly intact and avoid shaking off all the soil, since the roots hold the section together.
For disposal, use a tarp, bins, or a small trailer if allowed in your area. Some municipalities accept sod in yard waste pickup, while others do not. If you stack it in piles, keep the piles manageable so they do not heat up too much or create a soggy mess.
A useful rule: remove sod the same day you cut it when possible. Cut pieces dry out, curl, and get harder to handle if left in the sun. On hot days, even 30 minutes can make a difference.
Fix the soil after the sod is gone
The work is not finished when the grass is out. What remains under the sod determines how well your garden grows. Start by pulling out leftover roots, stones, and large chunks of grass. A rake helps level the surface and exposes any missed patches.
Check the depth of the soil. If you removed the sod cleanly, you may only need to loosen the top 4 to 6 inches. For many vegetables and flowers, that is enough to create a planting zone. If the soil is compacted, loosen it with a garden fork or broadfork so roots can move more easily.
Add compost if the soil looks tired or thin. A layer of 1 to 2 inches can improve texture, drainage, and nutrient content. Mix it into the top layer rather than leaving it on top if you want faster results. This step matters because sod removal often exposes soil that has been compressed for years.
Do not rush to plant in rough soil full of roots. Grass that is cut but not removed cleanly can regrow. One of the most overlooked mistakes is leaving tiny stolons and rhizomes behind; these are creeping grass parts that spread again if they stay alive.
Credit: rynolawncare.com
What to do if weeds or grass come back
If you see regrowth after a week or two, remove it before it strengthens. Small shoots are easy to pull when the soil is lightly moist. If the regrowth is heavy, it often means the original cut was too shallow or the roots were not fully removed.
In that case, cut back the area again before planting. It is faster to fix a small patch now than to fight grass inside a new garden bed all season.
Common mistakes that make the job harder
One common mistake is removing sod when the soil is too dry. Hard soil resists the blade and makes lifting much harder. Another mistake is working when the soil is muddy, which smears dirt, clogs tools, and creates uneven cuts.
People also often cut too deep. That removes useful topsoil and can leave the bed lower than the surrounding lawn, which affects drainage. On the other hand, cutting too shallow leaves roots behind. The goal is a thin slice of turf, not a thick slab of earth.
Another problem is ignoring the sod’s weight. A small-looking strip can become heavy very quickly. Lifting with your back instead of your legs is a fast path to soreness. Keep the pieces small enough to handle safely, even if that feels slower at first.
One more detail beginners miss: compacted edges around the garden can hold water. If the bed is lower than the surrounding lawn, rain may pool at the border. A slight slope away from the bed edge usually works better than a sharp dip.
How to make the process faster and easier
If you want better results with less effort, time the job wisely. Remove sod after a light watering or after a mild rain when the soil is moist but not soaked. That is often the easiest cutting condition for hand tools.
Divide the project into a few sessions if the bed is large. A 200-square-foot area is realistic for a weekend, but trying to do it all in one afternoon often leads to sloppy work. Fatigue causes poor cuts and rushed cleanup.
You can also use the removed sod in useful ways. Stack it grass-side down in a hidden corner to decompose, or use it to fill low spots elsewhere in the yard if the soil is clean and free of pests. This keeps material out of the waste stream and can save you from bringing in extra fill dirt.
For more detailed safety and tool-handling guidance, the CPSC’s official lawn and garden tool safety guidance is a helpful reference when using sharp blades or powered equipment.
Finish the bed so it is ready for planting
After the sod is gone and the soil is cleaned up, rake the surface level. Remove any remaining chunks that could block seedlings or make planting holes uneven. A smooth finish helps water move more evenly across the bed.
Then decide whether to plant right away or let the soil settle for a few days. If you added compost or loosened the soil deeply, a short settling period can help. If you are planting transplants, you can often move ahead sooner than if you are sowing tiny seeds.
Edge the bed if you want to keep grass from creeping back in. A shallow trench, metal edging, or stone border can help define the space. This is especially useful for gardens beside active lawn areas, where grass runners tend to spread back quickly.
The real benefit of careful sod removal is not just a cleaner bed. It gives your garden a stronger start, better drainage, and fewer weeds to fight later. That extra care in the first stage pays off all season long.
Credit: sodsolutions.com
FAQs
How long does it take to remove sod for a garden?
For a small garden bed, hand removal may take 2 to 4 hours. A larger area can take a full day or more. Soil type, moisture, and root thickness all affect the time.
Should I remove sod before adding compost?
Yes. Remove the sod first, then add compost to the exposed soil. This gives the compost better contact with the planting area and reduces the chance of grass growing through it.
Can I just cover the sod instead of removing it?
Yes, you can smother the sod with cardboard, mulch, or black plastic. This works well if you are not in a hurry. It is slower, but it reduces digging and can weaken the grass before removal.
What is the easiest tool for cutting sod by hand?
A sharp spade or square-edged shovel is usually the easiest tool for most home gardeners. A garden knife helps with edges and tight corners. Sharp tools slice cleaner and require less force.
Will grass grow back after I remove the sod?
It can, if roots or runners are left behind. To reduce regrowth, cut deeply enough to remove the full turf layer and clean up leftover root pieces before planting.