If you want to turn a lawn into a garden, the first job is not planting. The first job is removing or killing the grass so your new plants do not have to fight it.
how to start a garden where grass is currently growing depends on how big the space is, how fast you want results, and how much work you want to do upfront. The good news is that grass can be managed in a few practical ways, and some methods are much easier than people expect.
The smartest approach is to choose a method that fits your timeline, then prepare the soil correctly before planting. That is where most new gardeners win or lose. A clean start now usually saves months of weeding later.
Choose the right way to remove the grass
The best method depends on whether you want to plant soon or can wait a few weeks. If you rush this part, grass will keep coming back through the bed, especially from roots and runners.
For most home gardens, there are four reliable options: digging, smothering, solarizing, or using targeted herbicide. Each one has a different speed, effort level, and effect on the soil.
Digging out the grass
This is the fastest way to create a planting bed you can use right away. Use a flat shovel or edging spade to cut under the sod and lift it out in strips. For small areas, this is often the cleanest choice.
The downside is that it takes real physical work. If the grass has thick roots or spreads by runners, some pieces will be left behind. Even a few hidden roots can regrow if the soil stays moist.
Smothering the grass
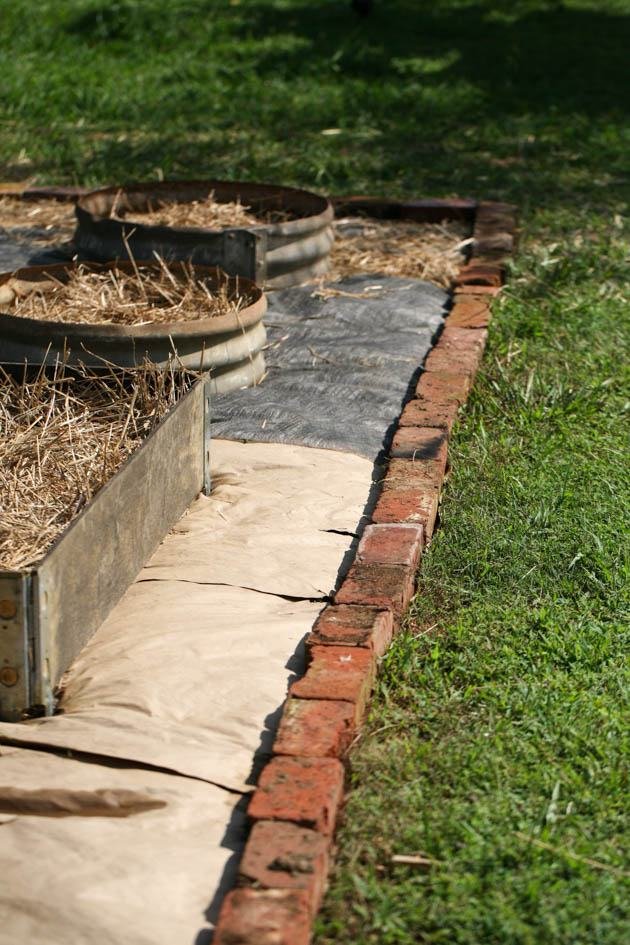
This method is simple and low cost. Cover the grass with cardboard, several layers of newspaper, or a thick tarp, then top it with mulch or compost. Without light, the grass weakens and dies.
This is a strong choice if you can wait 6 to 10 weeks. It works especially well for larger spaces where digging would be too exhausting. The main benefit is that it disturbs the soil less, which helps soil life stay intact.
Solarizing the area
Solarizing uses clear plastic to trap heat and cook the grass under the sun. It works best in hot weather, with full sun and moist soil underneath. In many climates, it can weaken or kill grass in 4 to 8 weeks.
This method is useful when you want fewer weeds later, but it is not ideal in cool, cloudy, or shady areas. A small detail many beginners miss: clear plastic warms the soil, while black plastic mainly blocks light.
Using herbicide carefully
Some gardeners use a non-selective herbicide to kill grass before starting a bed. If you choose this route, follow the product label exactly and avoid spraying on windy days. The label is the legal and safety guide.
If you want official safety and disposal guidance for home lawn chemicals, the EPA guidance on pesticide registration is a good reference. Even with herbicides, you still need to remove dead material and prepare the soil before planting.
Mark the bed and test the site before you disturb anything
Before you cut, cover, or spray, mark the shape of your garden. A hose, rope, or flour line helps you see the final layout before you commit. This step prevents awkward narrow beds that are hard to water and weed.
Also watch the site for one full day if you can. Note where water pools after rain, where shade falls, and where the grass looks healthiest. Strong grass often means compacted soil or better moisture, which can affect your future garden plan.
Look at sun, water, and foot traffic
Most vegetables need 6 to 8 hours of direct sun. Many flowers and herbs need less, but they still do better with good light. If your grass is thick in one spot, that area may get just enough sun for weeds but not enough for food crops.
Soil that gets stepped on often becomes compacted. Compacted soil drains slowly and makes roots work harder. If the area is a path now, you may need to loosen the soil deeper than you expect.
Check whether the grass is spreading by runners
Some grasses stay in neat clumps, while others send out long runners called rhizomes or stolons. These spreading types are harder to eliminate because they can regrow from small pieces. Bermuda grass and crabgrass are common examples of persistent spreaders.
If you see runners, plan on extra cleanup. Smothering may take longer, and shallow digging may leave roots behind. This is one of the biggest reasons new beds fail after a promising start.
Build the bed after the grass is gone
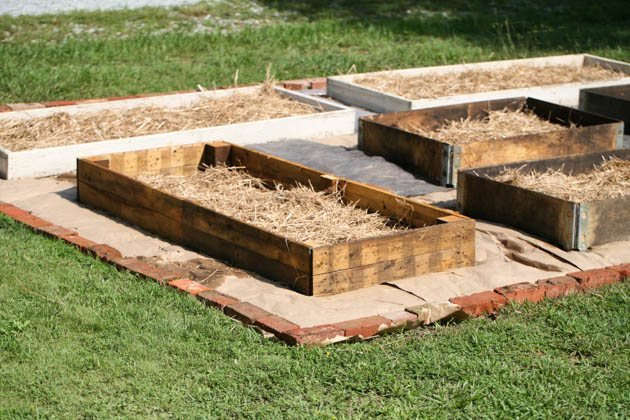
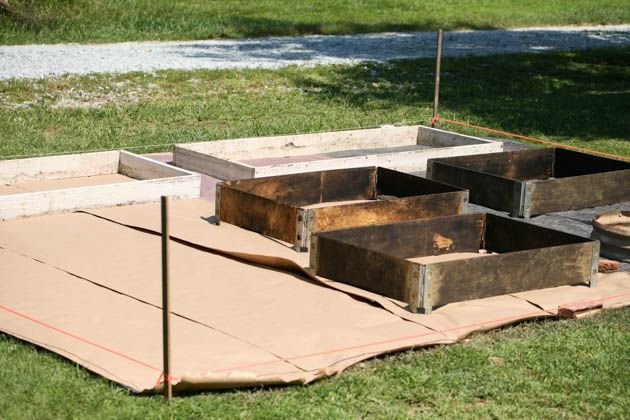
Once the grass is removed, do not plant immediately into bare, hard ground unless the soil is already healthy. A garden bed needs loose soil, organic matter, and a shape that helps water stay where roots can reach it.
Most successful beds are raised only a little at first. You do not need a fancy raised bed frame. Even adding 2 to 4 inches of compost on top can improve planting conditions if the native soil is not terrible.
Credit: ladyleeshome.com
Loosen the soil the smart way
If the ground is compacted, loosen it with a garden fork or broadfork to a depth of about 6 to 12 inches. Try not to turn the soil over completely unless you must. Heavy tilling can bring buried weed seeds to the surface.
One non-obvious point: soil structure matters more than soil color. Dark soil is not always rich, and light soil is not always poor. Texture, drainage, and organic matter are what really affect root growth.
Add compost instead of stuffing in random amendments
Compost improves moisture holding, feeds soil life, and gives young roots a better start. Spread 2 to 3 inches over the bed and mix it lightly into the top layer. If the ground is very poor, you can add a bit more, but compost alone is usually enough to begin.
Avoid adding too much sand to clay soil or too much fresh manure right before planting. Those shortcuts often cause more problems than they solve. Balanced compost is safer and more forgiving.
Shape the bed for easier watering
Flat beds look neat, but slightly raised beds drain better and warm faster in spring. A bed 3 to 4 feet wide lets you reach the center without stepping on the soil. That matters because walking on a bed compacts the very area roots need most.
If your garden sits in a wet spot, shape the center slightly higher than the edges. If it is very dry, create a shallow basin or use mulch to slow evaporation. Small shape changes can make a big difference in the first season.
Plan the transition from lawn to garden without creating new weed problems
Grass is not the only plant you need to worry about. Once the old lawn is removed, weed seeds often move in fast. Bare soil exposed to sun and rain is an open invitation.
The easiest way to avoid that problem is to cover the bed immediately after you prepare it. Mulch, compost, or temporary cover crops can protect the soil until you plant.
Use mulch as a temporary shield
A 2- to 3-inch layer of shredded leaves, straw, or wood chips helps suppress weeds and protect the soil surface. Keep mulch a few inches away from stems once plants are in the ground. Piling it directly against plants can trap moisture and cause rot.
Mulch also reduces evaporation. In warm weather, that means less watering and less stress on young transplants. It is one of the simplest ways to make a new garden easier to manage.
Plant cover crops if you need more time
If you are not ready to plant vegetables or flowers yet, use a short-term cover crop or keep the bed mulched. Cover crops can improve soil, but they take planning. For a beginner, mulch is usually the faster and safer option.
One detail many people miss: the first 30 days after bed prep are critical. If you leave the soil open, weeds can return before you ever set out your plants. A quick cover keeps the project from unraveling.
Pick plants that match the ground you created
Once the bed is ready, choose plants based on your light, moisture, and soil conditions. Do not choose only by looks. A plant that fits the site will need less rescue work later.
For a new garden, start with hardy choices. Fast-growing vegetables, native perennials, and tough annual flowers usually handle the adjustment better than delicate plants. If you want a reliable first season, simple choices are smarter than exotic ones.
Start with easy crops or plants
Leaf lettuce, bush beans, basil, marigolds, zinnias, coneflowers, and many native plants are beginner-friendly options. They establish fairly quickly and show clear signs when something is wrong. That makes them easier to learn with.
If your bed has partial shade, choose plants that tolerate lower light instead of forcing full-sun crops into the wrong place. Bad plant-site matches cause weak growth that looks like a watering problem, even when the real issue is light.
Leave room for airflow and growth
Plants need space for roots and leaves. Crowding looks full at first, but it creates disease problems and makes watering harder. Read mature spacing, not just the size of the plant at the nursery.
A common beginner mistake is planting based on how the garden looks on day one. A bed that seems empty in April may be perfectly spaced by June. That small patience pays off later.
Water correctly in the first few weeks
New beds dry out unevenly, especially after digging or soil loosening. The top layer may look moist while deeper roots stay dry. For young plants, that difference matters a lot.
Water deeply and less often once plants are established. For new transplants, keep the root zone evenly moist for the first 1 to 2 weeks. Then reduce watering as roots begin to grow outward.
Credit: ladyleeshome.com
Check moisture with your fingers, not just your eyes
Push a finger 2 inches into the soil. If it feels dry at that depth, water. If it feels cool and damp, wait. This simple test is more useful than guessing from the surface.
Early watering mistakes can be hard to spot. Too much water can be as harmful as too little, because roots need oxygen as well as moisture. Soggy soil often leads to weak growth and root disease.
Water in the morning when possible
Morning watering reduces evaporation and gives leaves time to dry before night. That lowers the chance of fungal problems. If you water late in the day, try to keep the leaves dry and aim at the soil instead.
Drip lines or a soaker hose are efficient if the bed is larger than a few square feet. They also help keep water off the foliage. That means fewer disease issues and less waste.
Common mistakes that make grass come back
The biggest mistake is planting too soon after only scraping off the top layer of grass. The roots often remain alive below the surface. Within weeks, you may see green blades pushing through your mulch.
Another common issue is stepping on the bed during planting or maintenance. Compacted soil invites weeds and makes roots slow down. Even a well-prepared bed can fail if people treat it like a path.
Watch for hidden grass clumps
After the first rain, inspect the bed carefully. Grass that survived preparation often appears in small bright patches. Pull it early, including the roots, before it gets established again.
If the grass returns in a wide patch, the bed may not have been fully cleared. In that case, pause and remove the regrowth before adding more plants. Chasing grass after the garden is full is harder than fixing it early.
Do not use too much fresh wood chip in the planting zone
Wood chips are good mulch on top of the soil, but they are not a planting mix. If you mix them deeply into the bed, they can tie up nitrogen while breaking down. That can slow young plant growth.
Keep chips on the surface, and use compost in the root zone. That simple split gives you weed control above and healthy soil below.
| Method | Speed | Best for | Main drawback |
|---|---|---|---|
| Digging | Immediate | Small beds, quick planting | Labor-heavy |
| Smothering | 6 to 10 weeks | Low-effort prep, larger areas | Needs patience |
| Solarizing | 4 to 8 weeks | Hot, sunny sites | Weather-dependent |
| Herbicide | Days to weeks | Persistent grasses, careful users | Requires strict label use |
Once you understand the method, the rest is mostly about patience and follow-through. The best beds are not just cleared once; they are prepared with enough care that weeds have a harder time returning.
If you want the easiest path, start with a small section first. A 4-by-8-foot bed is large enough to learn from but small enough to manage well. After one season, you will know which parts of your yard are easiest to convert.
Final advice before you plant
The simplest answer to how to start a garden where grass is currently growing is this: remove the grass fully, improve the soil, and protect the bed immediately afterward. That order matters more than fancy tools or expensive products.
If you take away only one idea, make it this: a little extra work before planting prevents a lot of weeding later. Strong bed prep, 2 to 3 inches of compost, and a good mulch layer can change the whole season.
Start small if you are unsure, and choose the method that fits your time. A careful first bed teaches you more than a rushed big one. Once that first space succeeds, the next section gets much easier.
Credit: ladyleeshome.com
FAQs
How long should I wait after killing grass before planting?
If you dig the grass out, you can plant the same day after preparing the soil. If you smother or solarize it, wait until the grass is fully dead and the bed is clear. For herbicide use, always follow the product label for waiting time.
Can I put soil on top of grass and plant right away?
Only if you first block the grass with cardboard, thick newspaper, or another barrier. Soil alone will not stop grass from growing through. Without a barrier, the grass usually pushes back up.
What is the easiest way to start a small garden patch?
For a small patch, digging out the sod is usually the fastest and simplest method. It gives you an open bed right away. After that, add compost and mulch before planting.
Will grass grow back through mulch?
Yes, it can. Grass with strong roots or runners often survives thin mulch layers. A thicker layer, usually 2 to 3 inches, works better, especially when the grass was removed first.
Do I need to remove all the roots before planting?
You should remove as much as you can, especially if the grass spreads by runners. Small leftover pieces can regrow. The more fully you clear the roots, the fewer problems you will have later.